Category: Uncategorized

  • Homeowner Guide to Boiler Replacement

    Homeowner Guide to Boiler Replacement

    If your boiler is making new noises, struggling to heat the house evenly, or needing one repair after another, replacement starts moving from “someday” to “probably soon.” This homeowner guide to boiler replacement is meant to help you make a clear, informed decision before you are dealing with no heat on the coldest day of the year.

    For many Massachusetts homeowners, the boiler is easy to ignore until it stops doing its job. But replacing a boiler is not like swapping out a small appliance. The right choice affects comfort, monthly utility costs, hot water performance in some homes, and how dependable your heating system will be for years to come. A rushed decision can leave you with the wrong size unit, avoidable installation issues, or a system that does not match your home’s needs.

    When boiler replacement makes sense

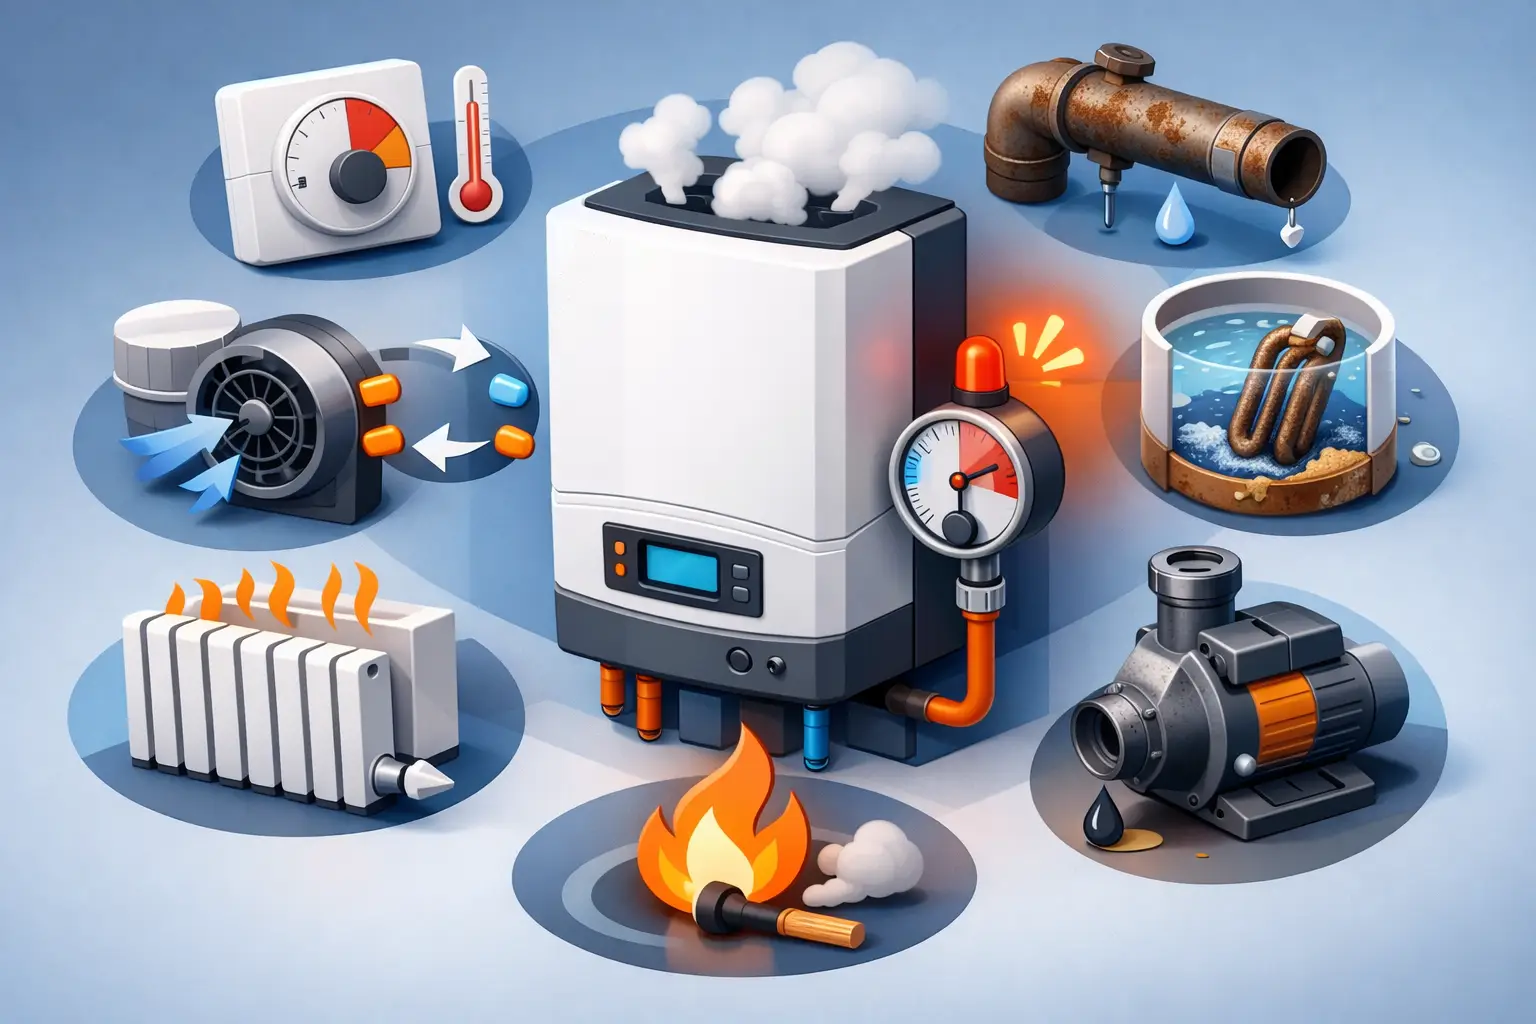
    Some boilers can be repaired and kept going for years. Others reach a point where continued repairs stop making financial sense. Age is one of the first things to look at. If your boiler is around 15 to 20 years old, efficiency and reliability usually begin to work against you, especially if repair calls are becoming more frequent.

    Performance problems also tell a story. If some rooms stay cold while others overheat, if your system takes too long to recover, or if your energy bills have climbed without a clear explanation, the boiler may be losing efficiency. Leaks, corrosion, and burner issues can often be repaired once, but repeated problems usually point to a larger decline.

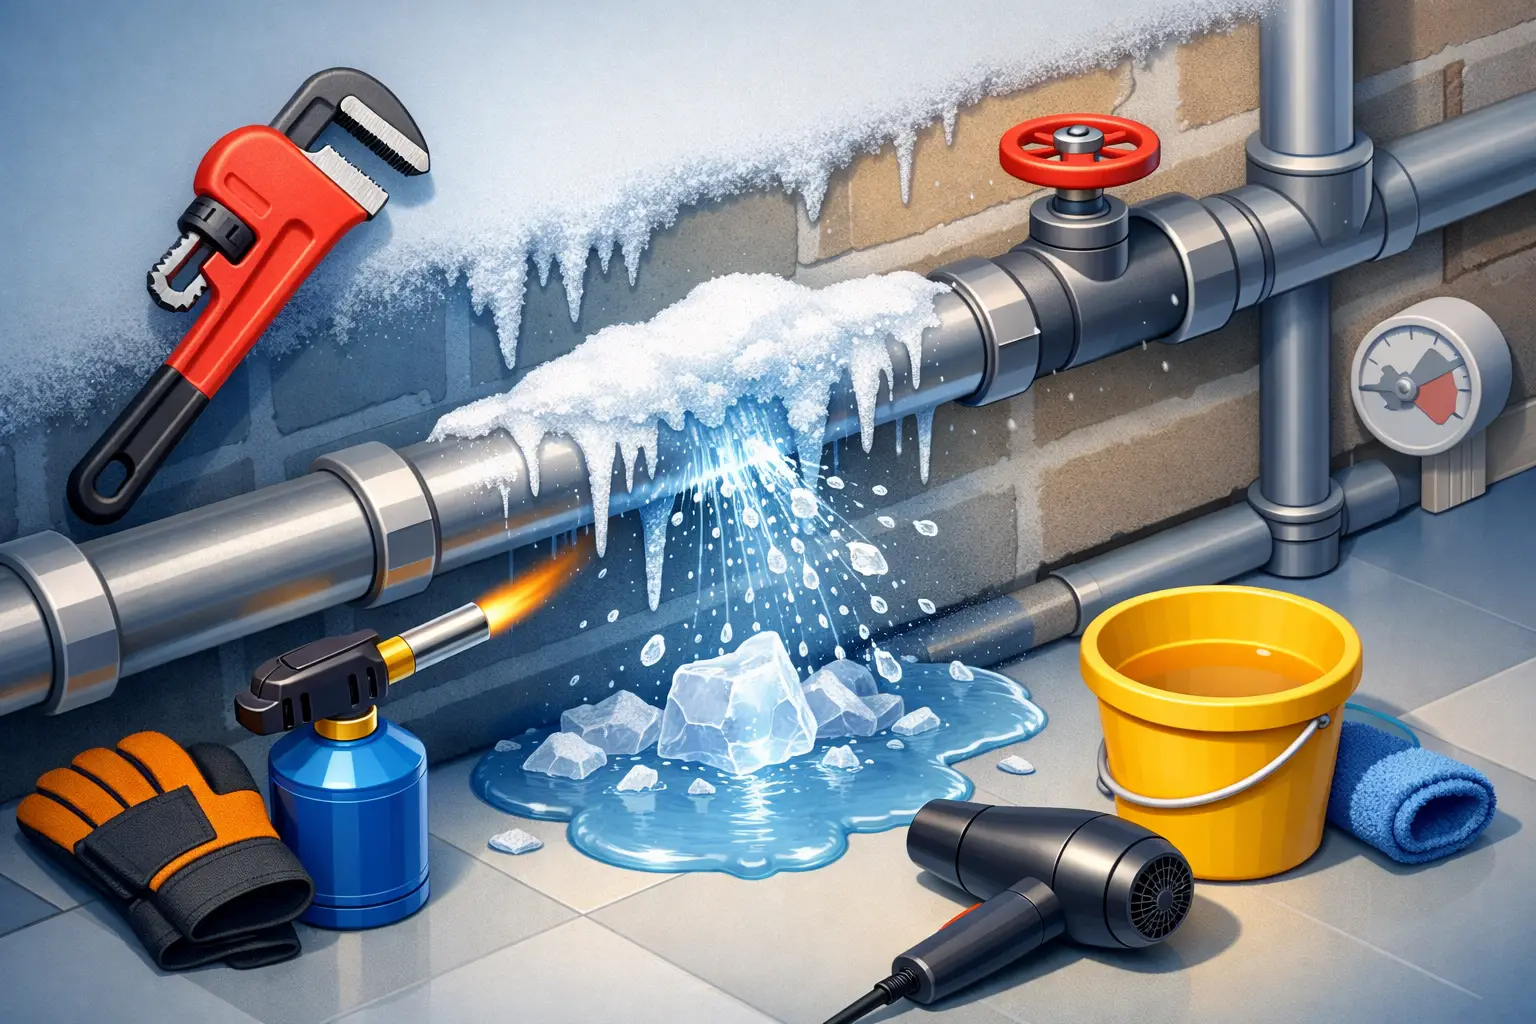
    There is also the safety side. A cracked heat exchanger, venting problem, or ongoing combustion issue should never be treated as a minor inconvenience. In those cases, replacement may be the safer and more responsible move.

    A homeowner guide to boiler replacement starts with system type

    Not every home should get the same kind of boiler. That is where many homeowners benefit from slowing down and asking the right questions. The boiler itself matters, but so do the radiation system, fuel source, venting setup, and the condition of the piping around it.

    If your home uses baseboard heat, radiant heat, cast-iron radiators, or steam, the replacement approach may be different. Steam systems in particular require specialized knowledge. A contractor should look at more than the boiler cabinet. They should evaluate near-boiler piping, controls, circulators, expansion components, venting, and whether the existing system design supports the new equipment properly.

    Fuel type matters too. Some homeowners are replacing older oil systems and considering a gas conversion at the same time. In the right house, that can improve convenience and efficiency. But it depends on the home, the available gas service, venting requirements, and overall installation cost. A good recommendation should reflect your actual house and budget, not a one-size-fits-all sales pitch.

    Choosing between standard and high-efficiency boilers

    This is one of the biggest decisions in any homeowner guide to boiler replacement. A standard-efficiency boiler usually costs less upfront and may be a practical fit in some replacement situations. A high-efficiency boiler can lower fuel use and deliver better performance, but it often comes with a higher installation cost and different venting or drainage requirements.

    For many homeowners, the trade-off comes down to how long they plan to stay in the house, the age and layout of the heating system, and whether the rest of the setup can support the upgrade. A high-efficiency model can be an excellent long-term investment, especially in a cold New England climate. But if the installation requires major changes, the payback may take longer than expected.

    The key is not chasing the highest efficiency rating on paper. It is choosing a system that is properly matched to the home and installed correctly. Even a premium boiler can underperform if it is oversized, piped incorrectly, or set up without careful testing.

    Why sizing matters more than most homeowners think

    A bigger boiler is not a better boiler. Oversizing is common in older homes because replacement equipment is sometimes chosen based on the size of the existing unit rather than the actual heating load. That can lead to short cycling, wasted fuel, uneven temperatures, and added wear on components.

    Proper sizing should be based on the home’s heat loss, not guesswork. That means looking at insulation levels, window quality, square footage, system type, and other factors that affect demand. In steam systems, sizing also relates to the connected radiation. In hot water systems, the calculation has a different path. Either way, accurate sizing is one of the most important parts of boiler replacement.

    This is one place where experience really shows. A contractor who understands residential heating systems can explain why a smaller, properly sized unit may outperform the larger boiler you have now.

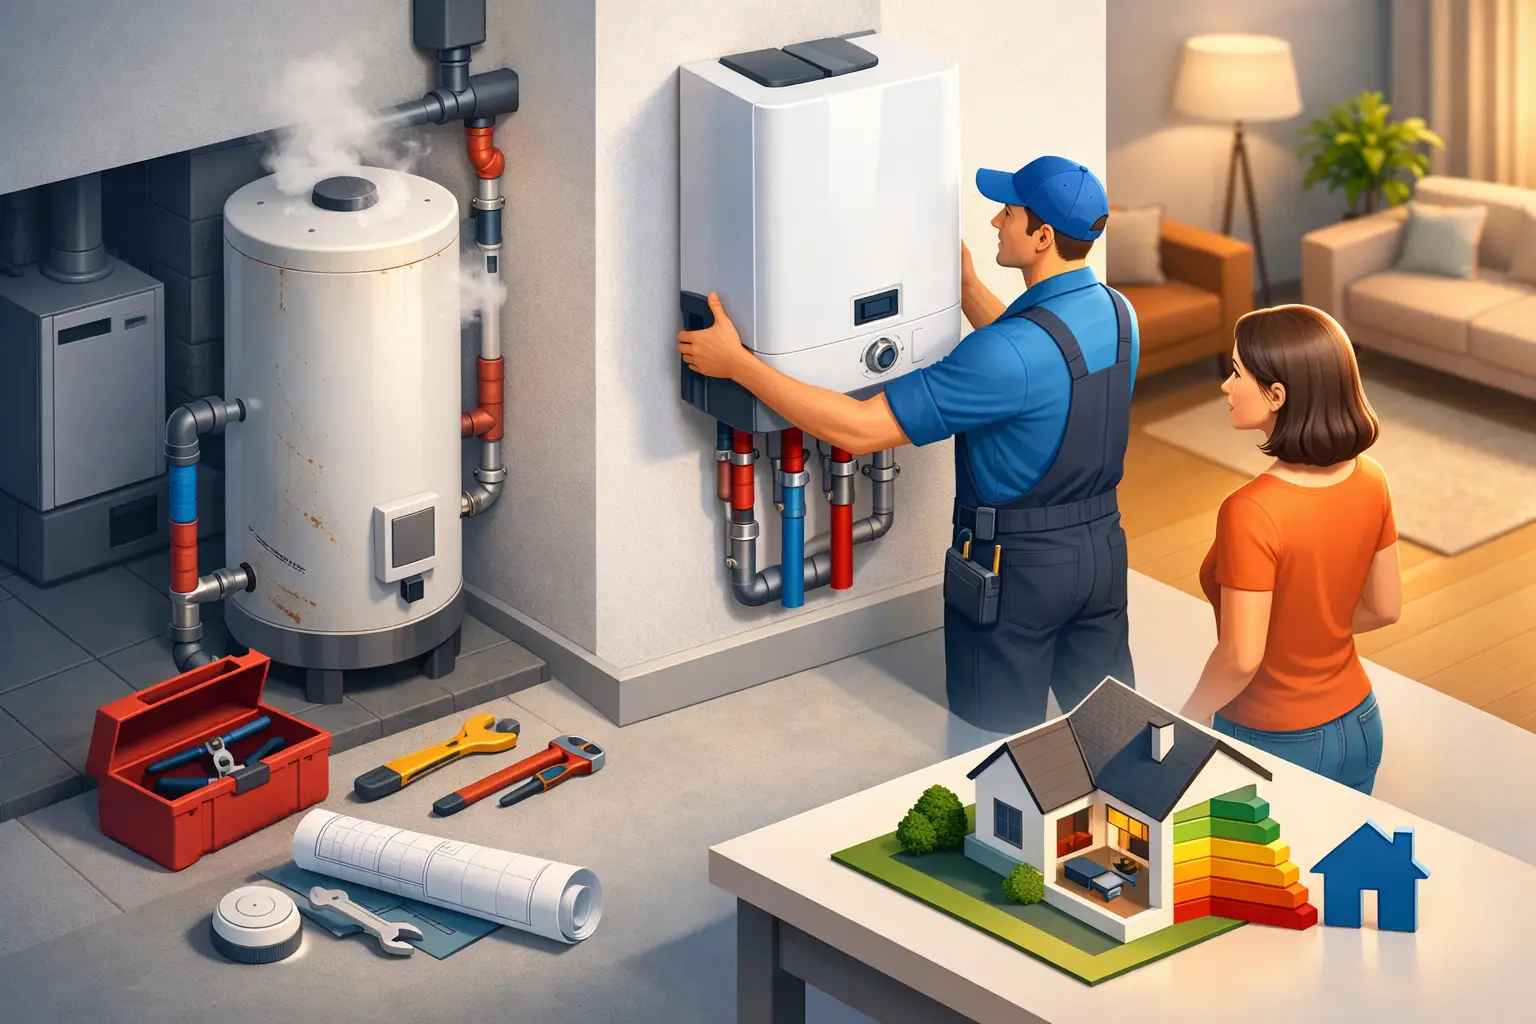
    What boiler replacement typically includes

    Homeowners sometimes expect the job to be just the boiler itself. In reality, a good replacement often includes related components that help the system run safely and efficiently. That may include circulator pumps, expansion tanks, air separators, controls, valves, venting parts, and upgrades to near-boiler piping.

    In some homes, the thermostat and zoning controls should also be reviewed. If the boiler is being replaced but the controls are outdated or unreliable, you may not get the comfort improvement you expect. The same goes for neglected distribution issues. If baseboards are air-bound, circulators are failing, or piping is in poor condition, those problems should be part of the conversation.

    That does not mean every replacement has to become a complete system overhaul. It means the proposal should reflect what the house needs to run properly, not just what is easiest to swap out quickly.

    How to think about cost without focusing only on the lowest quote

    Boiler replacement cost depends on the equipment, fuel type, efficiency level, venting needs, code updates, and how much system work is required around the unit. A straightforward replacement will cost less than a project that includes fuel conversion, major piping changes, or corrections to an older installation.

    The lowest quote is not always the best value. If one estimate leaves out important piping work, control upgrades, or removal of failing components, it may look attractive upfront and become expensive later. On the other hand, the highest quote is not automatically the most complete or most appropriate either.

    Ask what is included, what assumptions are being made, and whether permits, disposal, startup testing, and system balancing are part of the job. A clear proposal helps you compare options fairly.

    Timing your boiler replacement

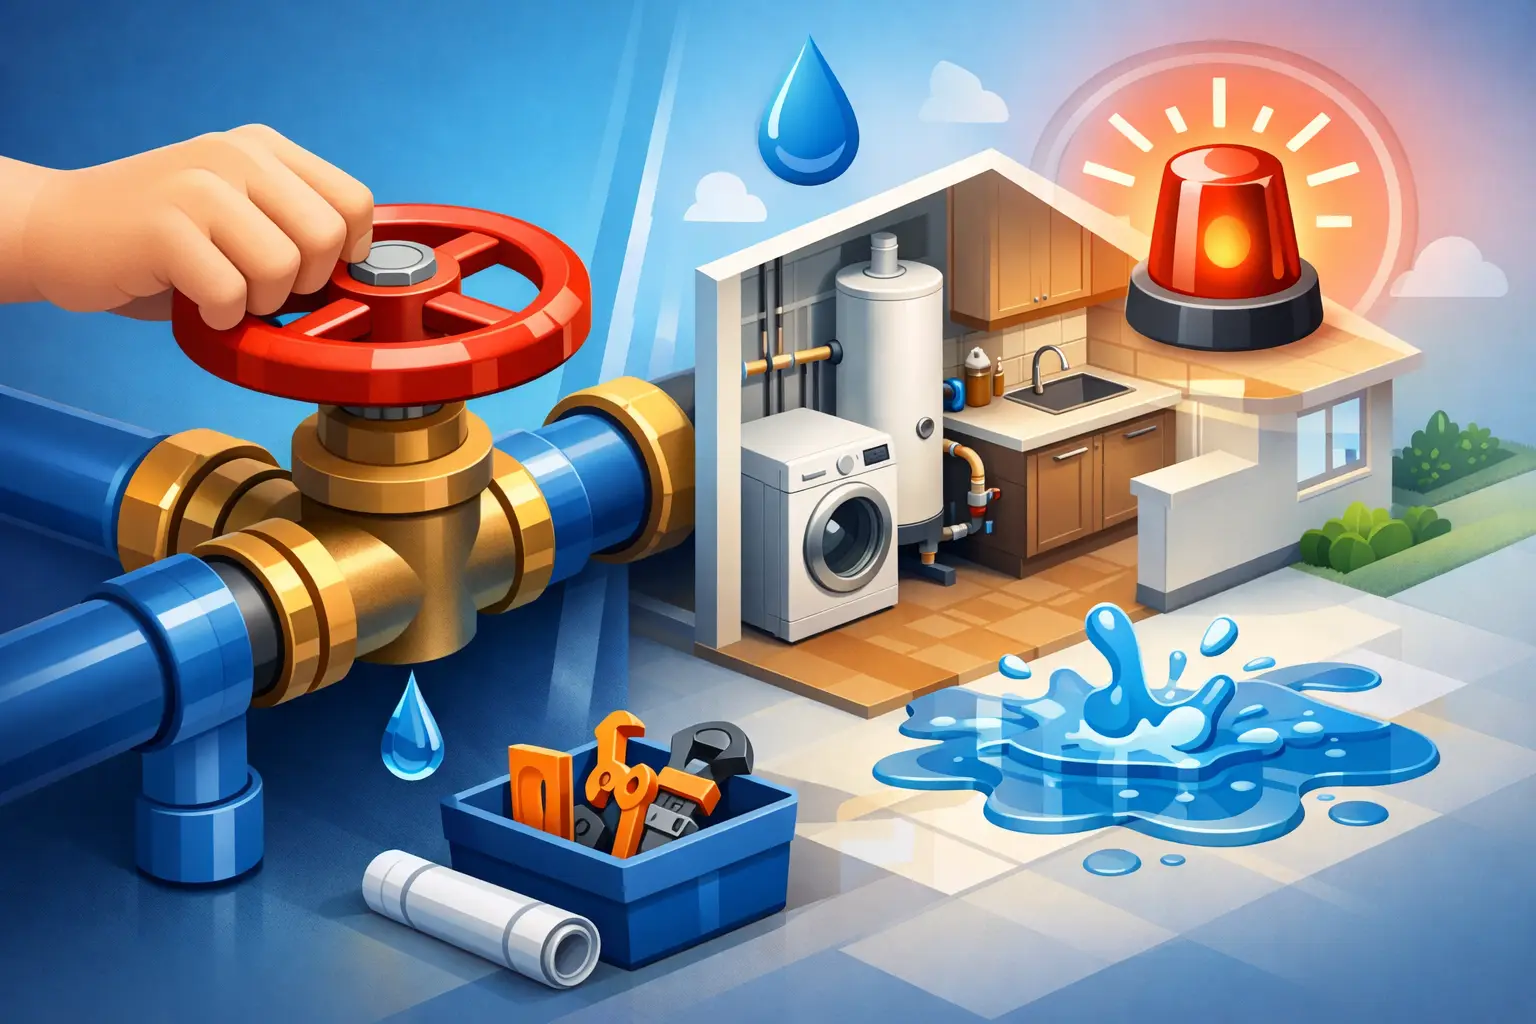
    Emergency replacements happen, especially during winter. When a boiler fails completely, speed matters. But if your current system is still operating and showing warning signs, planning ahead usually gives you better choices and less stress.

    Replacing a boiler before total failure gives you time to compare options, think through efficiency upgrades, and schedule the job more conveniently. It also reduces the chance of being forced into a quick decision during freezing weather when the priority is simply getting heat back on.

    For local homeowners, that planning can make a real difference. Companies like Mass Plumbing & Heating often see the same pattern every year: systems that gave several warning signs in the fall but were not addressed until they failed in the middle of a cold snap.

    Questions worth asking before you approve the job

    A good contractor should be comfortable answering practical questions in plain language. Ask how they determined the boiler size, whether they evaluated the existing radiation and piping, and what efficiency options make sense for your home. Ask what parts of the system will stay, what will be replaced, and why.

    You should also ask about expected lifespan, maintenance needs, warranty coverage, and what kind of startup and testing will be done after installation. If your home has an older steam or hydronic system, ask specifically about experience with that system type. Not every heating contractor handles those systems with the same level of skill.

    The goal is not to turn the conversation into an exam. It is to make sure the recommendation is thoughtful, complete, and tailored to your house.

    What to expect after installation

    A new boiler should heat more consistently, operate more quietly, and use fuel more efficiently than an aging unit. You may notice quicker recovery, steadier room temperatures, and fewer service concerns. That said, a new boiler is not maintenance-free. Annual service still matters.

    Routine maintenance helps protect efficiency, catch small issues early, and keep the system operating safely. It also gives your technician a chance to review pressure, combustion, controls, and overall system performance before small problems turn into larger ones.

    If your current boiler has been limping along, replacement can feel like a big project. But with the right evaluation and a clear installation plan, it becomes a smart home improvement instead of a stressful last-minute expense. The best time to start asking questions is usually before you have no heat and no room to choose.

  • How to Fix Frozen Pipes Safely

    How to Fix Frozen Pipes Safely

    A frozen pipe usually makes itself known at the worst possible time – you turn on a faucet and get little more than a trickle, or nothing at all. If you are searching for how to fix frozen pipes, the first priority is simple: protect your home from a burst pipe and water damage while restoring flow as safely as possible.

    In Massachusetts, frozen pipes are more than a winter inconvenience. They can split behind walls, under sinks, in basements, crawl spaces, and exterior-facing sections of the home. Sometimes the pipe is fully blocked by ice. Other times it is only partially frozen, which can be harder to spot but still risky. The good news is that some frozen pipes can be thawed safely if you act early and know your limits.

    How to fix frozen pipes without making the problem worse

    Before you reach for a hair dryer or space heater, take a minute to slow down. A rushed response can create a much bigger repair. Open flames, high-heat tools, and improvised fixes are where many homeowners get into trouble.

    Start by shutting off the water supply to the affected pipe if you can identify it. If you are not sure which valve controls that section, shutting off the home’s main water supply is the safer move. This matters because a frozen pipe may already have cracked. You might not see the damage until the ice begins to thaw and water starts escaping.

    Next, open the faucet served by the frozen pipe. Keep both the hot and cold handles open if it is a mixed fixture. This relieves pressure in the line and gives melting water somewhere to go. It also helps you confirm whether the thawing process is working.

    Then try to locate the frozen section. In many homes, the trouble spot is in an unheated area: along an exterior wall, under a kitchen sink on an outside wall, in a garage, attic, basement rim joist, or crawl space. Frost on the pipe, bulging, or a noticeably colder section can be clues. So can a room that feels draftier than the rest of the house.

    Safe ways to thaw a frozen pipe

    Once you have identified the likely frozen section, apply gentle heat. A hair dryer is often the most practical choice for exposed pipes. Start close to the faucet end of the frozen area and work gradually toward the colder section. That direction matters because it lets steam and water escape instead of building pressure behind the ice.

    Heating pads, warm towels, or a portable space heater can also work, but they require caution. Keep any electrical device away from standing water or damp surfaces. Never leave a heater unattended, and do not place it where it can overheat nearby materials.

    If the frozen pipe is under a sink, opening the cabinet doors can help warmer room air reach the plumbing. If the area has a safe supplemental heat source nearby, warming the room itself may be enough to loosen a minor freeze. In unfinished basements, raising the heat and using warm airflow can sometimes restore service without direct contact with the pipe.

    What should you never use? Avoid torches, propane heaters, charcoal devices, or any open flame. Do not use boiling water if there is any risk of damaging the pipe or surrounding materials. And do not pound on the pipe. Copper, PEX, and older plumbing materials can all be damaged by force or concentrated heat.

    Signs the pipe may have already burst

    Thawing is only part of the issue. The bigger concern is whether freezing caused the pipe to crack. A small split may not show itself until water pressure returns.

    Watch for staining, drips, bulging drywall, pooling water, or a sudden drop in pressure in other fixtures. If you hear water running behind a wall after thawing begins, stop what you are doing and keep the water supply off. That is a strong sign the pipe failed somewhere out of view.

    This is where it depends on access. An exposed pipe in a basement may be straightforward to evaluate. A pipe buried in a finished wall, ceiling cavity, or insulated chase is a different situation. If you suspect hidden damage, it is better to get a plumber involved before turning the water back on fully.

    When a frozen pipe is behind a wall

    This is the point where many homeowners hit a wall, literally. If the frozen section is hidden, your safest step is usually to warm the surrounding area rather than trying to force heat into a small opening. Raising the thermostat, opening nearby doors, and allowing warmer air to circulate can help. In some cases, carefully increasing room temperature for several hours is enough.

    Still, hidden pipe freezes are the least DIY-friendly. You do not want to overheat a wall cavity, damage finishes, or miss a burst line that is already leaking slowly. If one fixture has stopped working and the pipe path runs through an exterior wall, a professional assessment can save a lot of cleanup later.

    How to fix frozen pipes if only one faucet is affected

    If a single sink, shower, or hose bib has stopped working while the rest of the house still has water, the freeze is probably local to that branch line. That is usually more manageable than a whole-house freeze. Open the affected faucet and apply gentle heat to the most exposed sections first.

    If you restore flow, do not assume the problem is over. Let the water run at a pencil-thin stream for a short time while you inspect visible pipes for leaks. Then keep the area warmer than usual for the rest of the day. A pipe that froze once is likely in a vulnerable spot and may freeze again if the temperature drops overnight.

    When to call a plumber right away

    Some frozen pipe situations need fast professional help. Call right away if you cannot locate the frozen section, if the pipe is inaccessible, if the line has already burst, or if thawing attempts are not restoring flow. The same goes for homes with older plumbing, repeated winter freezes, or multiple affected fixtures.

    This is especially true if the frozen pipe is near heating equipment, gas lines, finished ceilings, or electrical wiring. Those conditions increase the risk and reduce the margin for trial and error. A licensed plumber can isolate the problem, thaw the line safely, repair damage if needed, and help address the reason it froze in the first place.

    For local homeowners, Mass Plumbing & Heating often sees frozen-pipe calls tied to poor insulation, air leaks near rim joists, pipes run through outside walls, and heating issues in lower-use parts of the home. Fixing the immediate freeze matters, but preventing the repeat is what protects the house.

    Preventing frozen pipes after you get water flowing again

    The best repair is the one you do not have to repeat next weekend. Once the pipe is thawed and confirmed leak-free, take a hard look at why it froze. Many homes do not have a plumbing problem so much as an exposure problem.

    Insulating pipes can help, especially in basements, crawl spaces, attics, garages, and exterior wall cavities where access is possible. Sealing drafts around sill plates, pipe penetrations, windows, and foundation openings is just as important. If cold outdoor air is reaching the pipe, insulation alone may not be enough.

    During very cold weather, keep the thermostat consistent day and night. Letting the house temperature drop too low to save energy can backfire if vulnerable pipes freeze. If a sink is on an outside wall, leaving cabinet doors open during a cold snap can make a real difference.

    For known problem spots, a slow drip may help during extreme cold, but it is not a long-term solution. If you have a line that freezes more than once, it may need rerouting, better insulation, heat tape rated for plumbing use, or correction of a larger heating or air-sealing issue.

    The trade-off between DIY and emergency service

    A careful DIY thaw can work for an exposed pipe with no signs of damage. That is the practical middle ground for many homeowners. But the trade-off is that frozen pipes are unpredictable. What looks like a simple blockage can turn into a leak inside a wall once the ice lets go.

    If you are confident, have clear access, and can use safe low heat, it is reasonable to try. If you feel unsure at any point, that is not overreacting. Water damage gets expensive quickly, and fast action is usually cheaper than cleanup, drywall repair, and mold remediation.

    Cold weather plumbing problems rarely happen on a convenient schedule. If your home has no water, only partial flow, or any sign of a cracked line, trust what you are seeing and act early. A steady, cautious response protects your home far better than a rushed fix.

  • Guide to Home Water Shutoff for Homeowners

    Guide to Home Water Shutoff for Homeowners

    A burst washing machine hose can dump gallons of water into your home in minutes. In that moment, knowing exactly where your main water shutoff is matters a lot more than knowing where the mop is. This guide to home water shutoff is built for homeowners who want to be ready before a leak turns into floor damage, drywall repairs, and a long cleanup.

    Most people do not think about the main shutoff valve until they need it fast. That is understandable. It usually sits quietly in a basement, utility room, crawl space, or near the water meter for years without getting much attention. But when a pipe lets go, a toilet supply line fails, or a water heater starts leaking heavily, shutting the water off quickly can limit damage and buy you time to make the right next call.

    Why every homeowner needs a guide to home water shutoff

    Your home plumbing system has one job – move clean water in and send wastewater out safely. When part of that system fails, the main water shutoff is your first line of defense. It stops the incoming water supply to the house so the problem does not keep feeding itself.

    That does not mean every plumbing issue calls for shutting off the whole house. A dripping faucet or a toilet that runs constantly can often wait for a targeted repair. But active leaks, broken fixtures, overflowing toilets that will not stop, or any plumbing problem causing visible water spread are different. In those cases, the shutoff valve can prevent a bad situation from becoming a major one.

    There is also a second reason to know your shutoff valve: planned work. If you are replacing a faucet, changing a washing machine hose, or having plumbing service done, knowing how to stop the water safely makes the job smoother and less stressful.

    Where to find the main water shutoff

    In many Massachusetts homes, the main water shutoff is located where the municipal water line enters the house. Often that means the basement, usually along a front wall, near the water meter, or close to the foundation. In slab homes or homes without basements, it may be in a utility closet, crawl space, garage, or near the water heater.

    If your home has well water, the setup may be a little different. The main control point may be near the pressure tank or well equipment. The principle is the same, but the exact location can vary depending on the home and age of the system.

    Older homes can be less predictable. Renovations, additions, and previous plumbing updates sometimes move piping routes or leave behind older valves that are no longer the best point of control. If you have more than one valve in the area where the water enters the home, it is worth confirming which one is the true main shutoff before an emergency happens.

    A good habit is to physically locate the valve now, make sure everyone in the household knows where it is, and clear away boxes or storage that might block quick access.

    What the valve usually looks like

    Most main shutoff valves are either gate valves or ball valves. A gate valve usually has a round handle that you turn multiple times to close. A ball valve usually has a lever handle that turns a quarter turn. When the lever is parallel to the pipe, it is generally on. When it is perpendicular to the pipe, it is generally off.

    Ball valves are often easier to operate and more reliable, especially in an emergency. Gate valves are common in older homes, but they can stick, wear out, or fail to close completely over time. That does not mean every older valve is a problem, but it does mean you should be careful with a valve that has not been touched in years.

    If the shutoff looks corroded, heavily rusted, or damp around the stem, do not force it. A valve that breaks while you are trying to shut it can create a worse problem. In that case, it may be safer to call a professional and, if necessary, contact your water utility for help with the curb stop or exterior shutoff.

    How to shut off the water safely

    If there is active leaking, move quickly but do not panic. Go straight to the main shutoff valve and turn it off. With a gate valve, turn clockwise until it stops. With a ball valve, rotate the lever a quarter turn until it is perpendicular to the pipe.

    Once the main water is off, open a faucet at the lowest level of the home and another at a higher level if possible. This helps relieve pressure and drains some of the water remaining in the lines. If the leak involves hot water equipment, use caution because the water may be very hot.

    If the issue is isolated to one fixture, you may not need to shut off the whole house. Toilets, sinks, and some appliances usually have local shutoff valves nearby. Turning off the fixture-level valve keeps the rest of the house usable. Still, if that smaller valve does not work or the leak is larger than expected, go to the main shutoff right away.

    When shutting off the water is the right move

    A practical guide to home water shutoff should be clear about urgency. Shut off the main water right away if a pipe has burst, a supply line has split, a fixture has broken off, or water is spreading across floors, ceilings, or walls. If a water heater tank is leaking heavily from the tank body, the cold-water supply to the heater should be turned off, and in some cases the main should also be shut down until the situation is assessed.

    For slower leaks, it depends. A small drip under a sink may only need the local stop valve turned off. A toilet that keeps filling may be controlled at the toilet valve. But if you are not sure where the leak is coming from, if water is near electrical equipment, or if the local valve will not close, shutting off the whole house is the safer choice.

    Winter adds another layer. Frozen pipes can crack and then leak when they thaw. If you suspect a frozen pipe has already split, be ready to shut off the water before full flow returns.

    Common problems homeowners run into

    The biggest issue is simple: people cannot find the shutoff when they need it. The second is a valve that has seized from age or corrosion. The third is confusion over whether to use a local shutoff, the main house valve, or the water company curb stop outside.

    The curb stop is not usually a homeowner DIY valve. It often requires a special tool and may be owned or controlled by the municipality or utility. If the indoor main will not close and you have active water damage, you may need emergency plumbing help and utility assistance.

    Another common problem is partial shutoff. A worn valve may reduce the flow without fully stopping it. That can mislead homeowners into thinking the system is safe to work on when it is not. If water still runs steadily after the valve is supposedly off, stop and get professional help.

    A little preparation goes a long way

    The best time to learn your shutoff is before you need it. Take a few minutes to find it, test access to it, and identify whether it is a gate valve or ball valve. If the valve looks questionable, schedule an inspection. Replacing a weak main shutoff is much easier on a calm weekday than during a flooded-night emergency.

    It also helps to label the valve clearly and keep a flashlight nearby if the basement lighting is limited. In households with older parents, teens, or anyone who may be home alone, show them where the shutoff is and how it works. In an emergency, that kind of preparation can save real money and stress.

    If you are already planning plumbing work, ask the technician to evaluate the main shutoff while they are there. A dependable local contractor like Mass Plumbing & Heating can tell you whether the valve is operating properly, whether replacement makes sense, and whether there are other shutoffs in the home you should know about.

    When to call a plumber instead of handling it yourself

    Shutting off the water is often a homeowner task. Repairing what comes next is not always one. If the valve will not move, leaks around the valve stem, only partly closes, or seems damaged, call a plumber. If a leak involves a hidden pipe in a wall or ceiling, a water heater, or any situation where the source is unclear, professional diagnosis matters.

    The same goes for repeat leaks, low water pressure after operating the valve, or signs that older plumbing materials may be failing. A quick response can limit damage, but a proper repair is what keeps the problem from coming back.

    A home feels a lot less overwhelming when you know where the water stops. That one piece of knowledge gives you control in a stressful moment, and that is something every homeowner should have.

  • How to Maintain Sump Pump the Right Way

    How to Maintain Sump Pump the Right Way

    A sump pump usually gets your full attention only after a storm, when the basement is already wet and the cleanup has started. If you want to avoid that kind of surprise, knowing how to maintain sump pump equipment before heavy rain hits is one of the smartest small tasks on your home maintenance list.

    Most sump pumps do not need constant attention, but they do need regular checks. Dirt builds up in the pit, floats can stick, discharge lines can clog, and power issues can go unnoticed until the pump is supposed to turn on. A little preventive care goes a long way, especially in Massachusetts where spring thaw, summer storms, and long wet stretches can all put pressure on your drainage system.

    Why sump pump maintenance matters

    Your sump pump has one job – move water away from your home before it becomes a problem. When that system fails, the damage can spread fast. Flooring, stored items, framing, and finished basement materials can all be affected in a single storm.

    Maintenance also helps you catch smaller issues before they turn into an emergency call. A pump that runs too often, makes unusual noise, or struggles to clear water may still be working, but not well. That is often the stage where a repair is simpler and less expensive than waiting for a total failure.

    There is also a practical point homeowners sometimes miss. A sump pump is part of a system, not a stand-alone appliance. The pit, check valve, discharge pipe, power supply, and sometimes a battery backup all need to work together. If one part is compromised, the whole setup is less reliable.

    How to maintain sump pump step by step

    The best approach is simple, consistent, and realistic. You do not need to take the whole system apart every month, but you should inspect it on a regular schedule.

    Start with a visual inspection

    Begin by looking at the sump pit and the area around it. The pump should be standing upright, and the pit should be free of obvious debris. If the pump has shifted or is leaning, that can interfere with how the float switch moves.

    Check the cord and plug for wear. If the unit is plugged into a ground fault circuit interrupter outlet, make sure the outlet has not tripped. Homeowners sometimes assume the pump has power because it is plugged in, but a tripped outlet or breaker can leave the system dead without any obvious warning.

    Take a quick look at the discharge pipe as well. It should be securely attached and directed away from the foundation. If water is discharged too close to the house, it can circle right back to the footing and make the pump work harder than it should.

    Test the pump with water

    One of the easiest ways to check operation is to slowly pour a bucket of water into the pit. As the water level rises, the float should lift and activate the pump. The pump should turn on, remove the water, and shut off once the level drops.

    This test tells you several useful things at once. It confirms the pump has power, the float switch is responding, and the motor is able to discharge water. If the pump hums but does not move water, or if it does not switch on at all, that is a sign something needs attention.

    Do not run the pump dry for testing. It is designed to operate with water present, and running it without water can shorten its life.

    Clean the pit and pump intake

    Over time, sediment, gravel, and general debris can collect in the sump basin. That buildup can clog the intake screen or interfere with the float switch. If your pump manufacturer provides cleaning instructions, follow those closely.

    In many homes, the practical maintenance step is to disconnect power, remove loose debris from the pit, and wipe away grime on accessible parts of the pump and float. If the pit contains a lot of mud or heavy buildup, a more thorough cleaning may be needed. The key is not to let the basin become a catch-all for dirt that can restrict operation.

    If you are not comfortable removing the pump, that is a good place to call a professional. Some units are straightforward to lift and clean. Others are harder to handle, especially in tighter pits or older installations.

    Check the float switch

    The float switch is a common failure point because it is the part that tells the pump when to turn on. If it gets trapped against the basin wall, tangled in the cord, or blocked by debris, the pump may not activate when water rises.

    During your test, make sure the float moves freely. There should be enough room for full motion without catching on anything. If your setup uses a vertical float or pressure switch instead of a tethered float, the inspection will look a little different, but the idea is the same – the activation mechanism must move and respond properly.

    Inspect the discharge line

    The discharge line carries water out of the home. If it is blocked, frozen, cracked, or disconnected, the pump cannot do its job well.

    Walk the line as far as you can and look for obvious signs of trouble. Outside, make sure the end is clear of leaves, mulch, dirt, or anything else that could restrict flow. In colder months, discharge lines are especially vulnerable to freezing. If water cannot exit, it may back up into the system or cause the pump to run under strain.

    Also listen for loud banging when the pump shuts off. That can point to a check valve issue. The check valve helps keep discharged water from flowing back into the pit, and when it fails, the pump may cycle more often than necessary.

    How often should you maintain a sump pump?

    For most homes, a basic inspection every three to four months is a good standard. At minimum, check it before spring rains and again before the wettest part of your fall or winter season. If your basement has a history of water issues, monthly testing is a safer routine.

    Usage matters too. A pump that runs often needs more attention than one that rarely turns on. The more a system works, the more wear it experiences. Homes with high groundwater, poor drainage, or frequent storms should treat sump pump maintenance as a regular seasonal task, not a once-a-year reminder.

    Don’t forget the backup system

    If your home has a battery backup sump pump, that system needs maintenance too. Test the backup periodically and check the battery condition according to the manufacturer’s recommendations. Batteries do not last forever, and a dead backup battery gives homeowners a false sense of security.

    This matters most during storms, which are exactly when power outages are more likely. A primary pump that works perfectly under normal conditions may still leave your basement vulnerable if the power goes out and the backup does not kick in.

    Warning signs your sump pump needs service

    Some issues are obvious, like standing water in the basement or a pump that does not turn on. Others are easier to miss. If the pump runs constantly, cycles on and off too often, makes grinding or rattling noises, or smells like it is overheating, it is worth having it checked.

    Age is another factor. Many sump pumps last around seven to ten years, but lifespan depends on quality, installation, and workload. If your pump is getting older and you are starting to notice performance changes, replacement may be the better value over repeated repairs.

    There is also the question of fit. A pump that is too small for the water load may not be failing in the traditional sense – it may simply be undersized. That is one of those situations where it depends on the home, the pit, and the drainage conditions around the foundation.

    When to call a professional

    Homeowners can handle basic testing and visible checks, but some sump pump problems call for experienced service. Electrical concerns, recurring clogs, improper discharge setup, switch failures, and pit drainage problems are better diagnosed by a plumber who works with these systems regularly.

    If your pump has stopped working during active flooding, that is not the time for trial and error. Fast service matters. A local company like Mass Plumbing & Heating can also evaluate whether the issue is the pump itself or something larger in the drainage system, which is often the difference between a quick fix and a recurring basement water problem.

    A sump pump is easy to forget when the basement is dry. That is exactly why routine attention matters. Give it a few minutes before the next storm season, and you give your home a much better chance of staying dry when it counts.

  • Backup Sump Pump Review for Homeowners

    Backup Sump Pump Review for Homeowners

    A flooded basement usually starts with bad timing – a power outage during a storm, a primary pump that quits without warning, or a pit that simply cannot keep up. That is why a backup sump pump review matters for homeowners in Massachusetts. If your basement protects a finished space, a boiler, a water heater, storage, or electrical equipment, your backup system is not an extra. It is part of the plan.

    Backup sump pump review – what really matters

    Most homeowners start by asking which brand is best. That is understandable, but it is not the first question that decides whether a backup pump will protect your home. The better question is whether the system matches the way your home floods.

    A backup sump pump has one job: take over when the primary pump fails or falls behind. That can happen because of power loss, switch failure, motor burnout, clogged discharge piping, or unusually heavy groundwater. The right setup depends on how often your pit sees water, how quickly it rises, whether your home has municipal water, and how much risk you are trying to avoid.

    In a practical backup sump pump review, we look at reliability first, then pumping capacity, then maintenance, then long-term cost. A cheaper unit can look appealing until you factor in battery replacement, weak performance during prolonged storms, or the lack of alarm features that would have warned you before water hit the floor.

    The three backup sump pump types

    Battery backup systems

    Battery backup pumps are the most common option for residential homes. They sit in the same sump pit or nearby basin and activate when the power goes out or when the main pump cannot keep up. For many homeowners, this is the most balanced choice because it works whether the problem is electrical failure or pump failure.

    The strength of a battery system is flexibility. It does not depend on city water pressure, and it can protect homes with private wells. The trade-off is runtime. Battery quality, charger condition, and pump demand all affect how long it will operate. A system that sounds strong on paper may run for a much shorter time if the groundwater is rising fast and the pump has to cycle constantly.

    The best battery backup units usually include a smart controller, audible alarm, monitoring lights, and a charger that keeps the battery in good condition without shortening its life. If a unit skips those features, it may save money upfront but cost you confidence when the weather turns.

    Water-powered backup systems

    Water-powered backups use municipal water pressure to create suction and remove water from the sump. They are attractive because they do not rely on a battery and can run as long as the city water supply remains available.

    These systems can be dependable in the right home, but they are not for everyone. If your property uses a well, they are generally not an option. They also use a significant amount of water to move sump water, which raises efficiency and utility cost concerns. In some homes, local plumbing layout or water pressure can also limit performance.

    A water-powered unit makes the most sense when the home has reliable municipal water, moderate backup needs, and an owner who wants to avoid battery maintenance. It is not always the strongest performer in high-volume flooding conditions.

    Combination systems

    A combination unit packages a primary sump pump and battery backup together. These systems are popular in new installations and replacements because they simplify compatibility and reduce guesswork.

    The main advantage is coordinated design. The float switches, charger, and backup pump are made to work together, and installation can be cleaner than piecing together separate components. The downside is that not every combo system is equally serviceable. Some are easier to maintain and repair than others, so the best value is not always the cheapest package.

    How to judge a backup pump without getting lost in specs

    Horsepower and gallons per hour matter, but they only tell part of the story. A backup pump should be reviewed based on real conditions, not just brochure numbers.

    The first thing to check is pumping rate at the head height your home actually has. Water must travel vertically and then out through the discharge line, and that resistance changes the pump’s performance. A system rated impressively at low head may deliver far less when installed in a real basement.

    Next, consider switch design. Many failures happen at the switch, not the motor. A dependable float or electronic sensor can make a major difference in how quickly the unit reacts and whether it cycles properly.

    Then look at the control panel. Homeowners often overlook this, but alarms and indicators are a big part of flood prevention. A backup pump that tells you about low battery, charger failure, pump activation, or high water level is far more useful than one that stays silent until there is a problem.

    Battery quality deserves its own attention. Some systems are sold with a basic battery that meets the minimum requirement but does not provide the runtime many owners expect. In a serious storm, reserve power matters. A stronger deep-cycle battery, properly maintained, usually delivers better peace of mind than an entry-level setup.

    What this backup sump pump review says about real-world performance

    In the field, the best backup systems are usually the ones that are sized correctly, installed cleanly, and tested regularly. Brand matters, but installation matters just as much. We have seen high-end pumps perform poorly because of bad discharge piping, poor check valve placement, undersized basins, or neglected batteries.

    For homes with occasional seepage and rare outages, a standard battery backup may be enough. For homes with a history of fast-rising groundwater, the review changes. You may need a higher-capacity backup, a larger battery reserve, or even a rethink of the whole sump layout.

    This is especially true in finished basements. If water damage would affect flooring, drywall, furniture, or mechanical equipment, it makes sense to design for the storm you hope never comes, not the average rainy day.

    Common mistakes homeowners make

    One common mistake is assuming the backup system never needs attention. Batteries age. Chargers fail. Floats can stick. If the unit has not been tested, there is no guarantee it will respond when needed.

    Another mistake is buying based only on price. A low-cost system may be fine in a low-risk basement, but it may not be the right fit for a home with frequent water entry. The replacement cost of a damaged boiler or finished basement usually makes the difference in pump price look small.

    Homeowners also sometimes mix components without checking compatibility. The pump, charger, battery, discharge setup, and controls should work as a system. If they do not, reliability suffers.

    Which backup sump pump is best for your home?

    If you want the simplest answer, most homeowners are best served by a quality battery backup or a well-built combination system. Those options provide protection during power outages and primary pump failure, which covers the two most common reasons basements flood even when a sump system is already installed.

    A water-powered backup can still be a good choice in the right home, particularly where municipal water is reliable and battery maintenance is a concern. But it is more situational, and it should be evaluated carefully.

    If your basement has flooded before, or your sump runs often during wet weather, it is worth treating backup protection as a serious part of the home’s plumbing system. That means proper sizing, professional installation, and periodic testing. For homeowners in Hudson and surrounding communities, Mass Plumbing & Heating can help evaluate whether your current sump setup is truly prepared for the next heavy storm.

    A smart review leads to a better decision

    The most useful backup sump pump review is not the one with the longest list of features. It is the one that helps you match the system to your basement, your water conditions, and your level of risk. A dependable backup pump should give you more than a product box in the corner. It should give you a better chance of waking up after a storm and finding your basement exactly the way you left it.

  • Plumbing Fixture Installation Cost Guide

    Plumbing Fixture Installation Cost Guide

    A faucet that drips all night or a toilet that rocks every time someone sits down usually starts as an annoyance. Then you start wondering about plumbing fixture installation cost, and whether this is a quick fix, a smart upgrade, or a project that could uncover bigger plumbing issues behind the wall.

    For most homeowners, the honest answer is: it depends on the fixture, the condition of the existing plumbing, and how straightforward the installation really is. A new faucet installed on a sink with solid shutoff valves is one kind of job. Replacing an old toilet on a damaged flange or swapping a kitchen sink that needs drain and countertop adjustments is another.

    What affects plumbing fixture installation cost?

    The biggest factor is the fixture itself. Installing a basic bathroom faucet is usually less involved than replacing a deep farmhouse sink, a shower valve, or a multi-piece tub and trim set. Some fixtures are simple remove-and-replace jobs. Others require supply line updates, drain modifications, mounting changes, or finish work after the plumbing is done.

    Labor conditions matter just as much as the product you choose. If the area is easy to access and the shutoffs work properly, the work tends to move faster. If a plumber has to deal with frozen valves, corroded fittings, old galvanized piping, or tight cabinet spaces, the total cost goes up because the job takes longer and may require extra parts.

    Your material choice also changes the price. Homeowners often compare one faucet to another and focus on the shelf price, but fixture quality can vary a lot. A builder-grade fixture may cost less upfront, while a heavier, better-made faucet or toilet often lasts longer and performs better. That does not always mean you need the most expensive model, but it does mean the cheapest option is not always the best value.

    In older homes across Massachusetts, age is often the hidden variable. A simple fixture replacement can expose worn stops, outdated supply lines, weak drainage, or venting issues that need attention before a new fixture is installed correctly. That is one reason estimates can vary from house to house.

    Typical plumbing fixture installation cost by fixture

    There is no single flat rate that covers every home, but there are common ranges homeowners can expect.

    Faucet installation

    Bathroom and kitchen faucet installations are often among the more straightforward fixture jobs. If the existing sink and connections are in good shape, labor is typically moderate. Costs rise when access is poor, the mounting hardware is badly corroded, or the new faucet requires a different hole configuration than the old one.

    Kitchen faucets can also be more expensive than bathroom faucets when they include pull-down sprayers, touchless components, or filtration connections. Those features are convenient, but they add setup time and sometimes require electrical or accessory adjustments under the sink.

    Toilet installation

    Toilet replacement is a common project, but pricing still varies. A standard toilet swap is usually fairly predictable if the flange, floor, and shutoff valve are in good condition. If the toilet has been leaking for some time, the wax ring may not be the only issue. A broken flange, soft flooring, or a valve that no longer shuts off properly can turn a basic replacement into a more involved repair.

    Toilet type matters too. One-piece toilets, skirted designs, comfort-height models, and smart toilets often take more time to position and secure than a standard two-piece unit. If you are upgrading for comfort or water savings, that can be worthwhile, but it should be part of the budget conversation.

    Sink installation

    A sink installation can range from simple to surprisingly complex. Replacing a bathroom sink with a similar model is usually manageable when dimensions line up. Kitchen sinks are different. The basin depth, width, and mounting style all affect labor.

    Drop-in sinks are usually easier to replace than undermount or apron-front styles. If a new sink changes the drain location or requires modifications to the countertop, disposal, trap, or dishwasher drain connection, installation costs increase. That is especially true when the visible finish has to look clean at the end, not just function properly.

    Shower and tub fixtures

    Replacing trim on an existing shower valve is very different from replacing the valve body itself. Cosmetic updates on compatible systems can be relatively efficient. Once work moves behind the wall, costs rise because access, piping condition, and compatibility all come into play.

    Tub spouts, showerheads, handhelds, and trim kits are often affordable upgrades on their own. A full shower fixture installation involving a new valve, diverter, and body sprays is a larger plumbing project. It offers a noticeable improvement in comfort and function, but it is not priced like a simple faucet swap.

    Why estimates can differ so much

    Homeowners are often surprised when one fixture install sounds inexpensive and another comes in much higher. That difference is not always about pricing style. Sometimes it reflects the real conditions on site.

    An estimate for plumbing fixture installation cost usually includes some combination of labor, basic fittings, connection materials, disposal of the old fixture, and any code-related adjustments needed for a proper installation. What changes the total is how much uncertainty exists before the work begins.

    For example, a plumber may be able to quote a straightforward toilet replacement with confidence. A shower valve replacement in an older bathroom may require more allowance because the wall may need to be opened, the piping may be outdated, and the trim may not match as expected once the old parts come off.

    That is why transparent estimates matter. A good contractor should explain what is included, what could change, and what conditions might add cost once the work starts.

    Repair or replace?

    Not every fixture needs to be replaced. In some cases, a repair is the more practical choice. A faucet with a worn cartridge, a toilet with a failing fill valve, or a showerhead clogged with mineral buildup may be worth fixing if the fixture is otherwise in good shape.

    Replacement makes more sense when the fixture is leaking repeatedly, parts are hard to find, corrosion is advanced, or the fixture is no longer meeting your needs. If you already plan to update the room, replacement is often the better long-term move because it avoids paying for repairs on something you intend to remove later.

    Water efficiency can also factor into the decision. Newer toilets, faucets, and shower fixtures can reduce water use without sacrificing performance when you choose quality products. That can be especially appealing for households looking to lower utility costs over time.

    How to keep fixture installation costs under control

    The simplest way to manage cost is to match the new fixture to the existing setup whenever possible. Keeping the same basic size, mounting style, and connection layout often avoids extra labor. That does not mean you cannot upgrade. It just means dramatic design changes usually cost more to install.

    It also helps to think beyond the fixture price. A discount faucet that fails early is not a bargain if it has to be replaced in a year or two. Reliable brands and solid construction often pay off in fewer leaks, better performance, and fewer service calls.

    If you are replacing more than one fixture, grouping work can sometimes improve efficiency. Installing a faucet, toilet, and shutoff valves during the same visit may be more cost-effective than spacing out separate calls over several months. It also gives your plumber a chance to spot related issues before they become emergencies.

    Choosing the right plumber for fixture installation

    The lowest number on paper is not always the lowest total by the end of the job. Fixture installation affects daily comfort, water use, and the condition of cabinets, floors, and finishes around the plumbing. A proper installation should be leak-free, stable, code-conscious, and built to last.

    That is why homeowners usually do best with a licensed, experienced plumbing contractor who works on these systems every day. In a community like Hudson and the surrounding area, local experience matters. Older homes, water quality, fixture wear, and existing piping materials all influence what a clean installation looks like.

    Mass Plumbing & Heating works with homeowners on both routine fixture replacements and more involved plumbing upgrades, with a focus on clear communication and dependable workmanship. When the goal is to fix the problem once and not revisit it next month, that experience matters.

    If you are planning a fixture replacement, the best next step is a realistic assessment of the existing plumbing, the fixture you want to install, and the condition of everything connected to it. A good installation is not just about getting a new fixture in place. It is about making sure it works the way it should from day one and holds up the way your home needs it to.

  • Air Conditioner Repair: What to Do First

    Air Conditioner Repair: What to Do First

    When your AC quits on the hottest day of the week, the problem rarely feels minor. Air conditioner repair becomes urgent fast when bedrooms won’t cool, the house feels sticky by evening, or warm air starts blowing through the vents while the system keeps running.

    For homeowners in Hudson and nearby Massachusetts communities, the goal is usually simple: get the system working again without wasting time, money, or risking a bigger breakdown. The tricky part is knowing what counts as a quick fix, what points to a real equipment problem, and when calling for professional service is the smarter move.

    When air conditioner repair is worth calling for right away

    Some AC problems can wait a day or two. Others should be addressed as soon as possible, especially during a heat wave or when the system is showing signs of strain.

    If your air conditioner is not turning on, tripping the breaker, making loud banging or screeching noises, leaking water around the indoor unit, or blowing warm air for an extended period, it is time to take the issue seriously. A system that runs constantly without cooling well is another red flag. So is ice on the refrigerant lines or the outdoor unit.

    These symptoms do not all point to the same failure. A dirty filter can reduce airflow and cause performance issues. A failing capacitor, refrigerant problem, blocked drain line, blower issue, or thermostat fault can create very different repair needs. That is why guessing can get expensive. Replacing the wrong part or continuing to run the system can turn a manageable repair into compressor damage or water damage.

    A few things you can check before scheduling air conditioner repair

    There are a handful of basic checks that make sense for most homeowners. They are safe, simple, and sometimes save you from an unnecessary service call.

    Start with the thermostat. Make sure it is set to cool, not fan, and that the temperature is actually lower than the current room temperature. If the screen is blank, the batteries may need to be replaced.

    Next, check the air filter. A clogged filter is one of the most common causes of poor airflow and comfort complaints. If it looks dirty, replace it. This will not solve every cooling problem, but it is one of the easiest ways to help the system operate properly.

    Then look at the breaker panel. If the AC breaker has tripped once, reset it one time. If it trips again, stop there. Repeated breaker trips usually mean there is an electrical issue that needs professional diagnosis.

    You can also inspect the outdoor condenser. Leaves, grass clippings, and debris around the unit can restrict airflow. Clearing space around it helps, but do not open panels or start taking components apart.

    If those basics do not restore cooling, the system likely needs actual repair work rather than a quick adjustment.

    Common problems behind AC breakdowns

    Weak airflow and uneven cooling

    If some rooms are cool and others stay warm, the problem may be airflow-related. Dirty filters, a struggling blower motor, blocked ducts, or an evaporator coil issue can all reduce the amount of conditioned air moving through the house.

    In some homes, the issue is not a broken AC at all. Duct leakage, poor return air design, or insulation problems can make cooling feel inconsistent. That is why a proper diagnosis matters. Good repair work is not just about getting cold air somewhere. It is about restoring dependable comfort throughout the home.

    Warm air from the vents

    Warm air is one of the most frustrating cooling issues because the system may still sound like it is operating normally. This can happen because of low refrigerant, a failed capacitor, compressor trouble, thermostat problems, or an outdoor unit that is not doing its job.

    The trade-off here is simple. If the repair is caught early, it may be relatively straightforward. If the system keeps running while cooling performance drops, wear and tear can spread to other components.

    Strange noises or smells

    Air conditioners are not silent, but they should be predictable. Grinding, buzzing, rattling, or squealing sounds usually mean something has changed mechanically or electrically.

    Odors can tell a story too. A musty smell may point to moisture buildup or drainage issues. A burning smell can signal an electrical problem and should not be ignored. These are not symptoms to watch for another week and hope they disappear.

    Water leaks and frozen components

    A little condensation is normal. Water pooling around the unit is not. Clogged condensate drains, pump problems, frozen evaporator coils, and airflow restrictions can all lead to leaking.

    If you see ice on the indoor coil or refrigerant line, turn the system off and call for service. Many homeowners assume ice means the unit is cooling extra well. In reality, it usually means the system is under stress and not operating the way it should.

    Why professional air conditioner repair saves money over time

    It is understandable to want the fastest and least expensive fix. But with AC systems, the lowest short-term cost is not always the best value.

    Professional air conditioner repair starts with identifying the actual cause of the problem. That matters because many symptoms overlap. A thermostat issue, low airflow, and refrigerant problem can all lead to poor cooling, but they require very different solutions.

    A trained technician can also catch related issues before they become emergencies. Maybe the failed part is obvious, but the contactor is worn too, the drain line is partly blocked, or the capacitor is outside its proper range. Addressing those issues early can help prevent another no-cooling call a few weeks later.

    For homeowners, that means fewer surprises, less stress, and a better chance of keeping the existing system running safely and efficiently for as long as it makes financial sense.

    Repair or replace? It depends on the system

    Not every broken air conditioner should be repaired. But not every older one needs replacement either.

    Age is part of the decision. If the system is more than 10 to 15 years old, uses outdated refrigerant, or has needed multiple repairs recently, replacement may be worth discussing. Efficiency matters too. Older systems often cost more to run and may struggle to keep up during long stretches of hot weather.

    That said, age alone is not the whole story. A well-maintained system with a single repair need may still have useful life left. On the other hand, a newer unit with neglected maintenance can develop avoidable problems early.

    This is where honest guidance matters. Homeowners deserve a clear explanation of the repair cost, the condition of the system, and whether putting money into it is practical. A dependable contractor should be able to explain both options without pressure.

    How to avoid emergency air conditioner repair

    The best way to reduce mid-season breakdowns is regular maintenance. That does not mean overcomplicating things. It means taking care of the basics before small problems grow.

    Change filters on schedule. Keep the outdoor unit clear. Pay attention to new noises, weak airflow, and rising humidity indoors. If the system is not cooling like it used to, do not wait until it stops altogether.

    Professional maintenance also helps. A seasonal inspection can catch worn electrical components, dirty coils, drainage issues, refrigerant concerns, and performance problems that are easy to miss from the homeowner side. In Massachusetts, where the cooling season may feel short compared to winter heating, it is easy for AC maintenance to get pushed aside. Then the first serious heat wave arrives and the system is asked to do a lot, all at once.

    Choosing the right company for air conditioner repair

    When you need service, speed matters, but so does trust. You want a company that shows up prepared, communicates clearly, and treats your home with respect.

    Look for a contractor with real residential HVAC experience, strong local reputation, and the ability to troubleshoot instead of just swapping parts. Clear recommendations matter. So does professionalism. If you are calling because your home is uncomfortable, especially with kids, older family members, or anyone sensitive to heat, reassurance counts too.

    For many homeowners, there is also value in working with one trusted local company that understands the full picture of home comfort. In houses where cooling, heating, plumbing, and indoor air quality issues can overlap, broad experience helps. That is one reason homeowners turn to family-owned companies like Mass Plumbing & Heating when they want practical answers and reliable service.

    Air conditioner problems rarely happen at a convenient time, but they do not have to turn into drawn-out stress. When something feels off, acting early usually gives you more options, better repair outcomes, and a more comfortable home when you need it most.

  • 8 Boiler Short Cycling Causes to Check

    8 Boiler Short Cycling Causes to Check

    When a boiler fires up, runs for a minute or two, shuts off, and then starts again soon after, that is not normal wear and tear. Boiler short cycling causes are usually tied to airflow, water flow, heat transfer, controls, or system sizing – and the longer it goes on, the more stress it puts on your heating equipment.

    For homeowners in Massachusetts, short cycling often shows up first as uneven heat, higher utility bills, or a boiler that sounds like it is constantly trying to catch up. Sometimes the problem is relatively simple. Other times, it points to a deeper issue that can shorten the life of the boiler if it is ignored.

    What short cycling actually means

    A properly working boiler should run in steady, efficient heating cycles. It should turn on, heat the water to the target temperature, distribute that heat through the system, and then shut off until the home needs more heat.

    Short cycling happens when that run time gets cut too short. Instead of operating in longer, stable cycles, the boiler keeps stopping and restarting. Those repeated starts are hard on components like the igniter, gas valve, controls, and circulator. They also waste fuel because boilers are generally less efficient during startup than during steady operation.

    The most common boiler short cycling causes

    1. The boiler is oversized for the home

    This is one of the most common causes, especially in replacement situations where a new unit was selected based on the old boiler size rather than the home’s actual heat loss. An oversized boiler heats the water too quickly and reaches its setpoint before the system has had time to distribute heat evenly.

    The result is a system that turns off early, then turns back on again once temperatures drop. Bigger is not better with boilers. Proper sizing matters for comfort, efficiency, and equipment life.

    2. A dirty heat exchanger is trapping heat

    When the heat exchanger is coated with soot, scale, or debris, it cannot transfer heat the way it should. Heat builds up inside the boiler faster than normal, and the high limit control may shut the unit down to protect it.

    This is especially relevant in older boilers or systems that have gone too long without maintenance. The boiler may still run, but it is running hotter, less efficiently, and with more strain than it should.

    3. Poor water circulation through the system

    Boilers depend on steady water movement. If the circulator pump is failing, air is trapped in the lines, valves are closed, or the system has a blockage, hot water may not move away from the boiler fast enough.

    That causes the boiler temperature to rise quickly, which can trigger a shutdown. In homes with baseboard heat, radiant heating, or multiple zones, circulation issues can show up differently from one area to another. One part of the house may heat fine while another stays cool.

    4. The thermostat is causing rapid calls for heat

    Sometimes the boiler itself is not the root of the problem. A thermostat in a poor location, such as near a draft, direct sunlight, or a heat source, can create inaccurate readings. The thermostat may tell the boiler to shut off and restart more often than it should.

    A faulty thermostat or wiring issue can do the same thing. This is one of those problems that sounds minor but can be frustrating to diagnose without looking at the full system.

    5. Low water pressure in the boiler system

    Boiler systems need the right pressure to move water properly. If the pressure is too low, the system may struggle to circulate heat and may shut down as a safety measure.

    Low pressure can be caused by a leak, a failed pressure reducing valve, or an expansion tank issue. If you have to keep adding water to the system, that is a sign something else is wrong. Topping it off repeatedly is not a real fix.

    6. The expansion tank has failed

    The expansion tank helps manage pressure changes as water heats and cools. When it becomes waterlogged or loses its air charge, pressure in the system can swing too high or behave unpredictably.

    That can lead to nuisance shutdowns, relief valve discharge, or short cycling. Homeowners do not always connect the expansion tank to the boiler’s behavior, but it plays an important role in stable operation.

    7. The flame sensor or safety controls are interrupting operation

    Modern boilers are designed to shut down when a safety control sees a problem. If the flame sensor is dirty, the unit may light briefly and then shut off because it cannot confirm proper burner operation. Similar issues can happen with pressure switches, limit controls, blocked vent safety devices, or rollout protection depending on the boiler type.

    In these cases, short cycling is not random. The boiler is reacting to a condition that needs attention. Resetting the system may get it running again for a while, but it usually does not solve the cause.

    8. Venting or combustion problems

    A boiler needs proper combustion air and safe venting. If the intake or exhaust is blocked, if vent piping is damaged, or if the burner is not adjusted correctly, the unit may shut down early to protect the home and the equipment.

    This is one area where homeowners should be careful. Combustion and venting problems are not just efficiency issues. They can also become safety issues, especially with gas-fired equipment.

    Signs the problem is getting worse

    Short cycling rarely stays the same for long. What starts as an occasional nuisance can turn into a no-heat call during the coldest part of winter. If your boiler is short cycling, watch for warning signs like rising fuel bills, banging or kettling sounds, cold spots in the house, frequent resets, or a boiler that seems to run all day without keeping up.

    You may also notice that the system feels hot but the rooms do not get comfortable. That usually means heat is being produced but not delivered well. In a hydronic system, that points back to circulation, control, or sizing issues more often than people expect.

    Boiler short cycling causes homeowners should not ignore

    Some boiler issues are inconvenient but manageable for a short time. Short cycling is not one of them. Every unnecessary startup adds wear to ignition components and controls. The boiler burns more fuel, comfort drops, and the risk of a larger repair goes up.

    There is also a timing problem with delayed repairs. A boiler that short cycles in mild weather may fail completely once outdoor temperatures drop and heating demand increases. That is why it makes sense to investigate the issue early instead of waiting for a full breakdown.

    What you can check before calling for service

    There are a few basic things homeowners can safely notice before scheduling a repair. Check the thermostat setting and battery if it has one. Make sure baseboard units or radiators are not blocked by furniture or rugs. If your system pressure gauge is visible, see whether it looks unusually low or high compared to normal.

    You can also pay attention to when the cycling happens. Does it happen only on one zone, only during very cold weather, or every time the boiler runs? That information can help narrow down the cause.

    Beyond that, a proper diagnosis usually requires testing. Boiler short cycling causes often overlap. A system could have an oversized boiler and a weak circulator. It could have a dirty heat exchanger and an expansion tank problem. Replacing one part without confirming the full picture can waste time and money.

    When professional boiler service is the right move

    If your boiler is repeatedly shutting off and restarting, professional service is the safest next step. An experienced technician can test operating temperatures, system pressure, circulator performance, combustion, venting, safety controls, and thermostat communication rather than guessing from symptoms alone.

    That matters because the fix depends on the actual cause. One home may need control repair or a tank replacement. Another may need system cleaning, air removal, or a deeper conversation about equipment sizing. At Mass Plumbing & Heating, this is exactly the kind of problem where a careful diagnosis saves homeowners from repeat repairs and winter headaches.

    A boiler should heat your home steadily and quietly, without constant starts and stops. If yours is not doing that, the best next step is simple: have it checked before a small cycling issue turns into a cold house at the worst possible time.

  • Air Conditioner Basics for MA Homeowners

    Air Conditioner Basics for MA Homeowners

    If your house feels sticky by midafternoon, your upstairs never quite cools down, or your energy bills jump the minute summer arrives, your air conditioner is telling you something. For homeowners in Hudson and nearby Massachusetts communities, cooling problems are rarely just about comfort. They affect sleep, indoor air quality, and how hard the rest of your home systems have to work.

    What your air conditioner is really doing

    An air conditioner does more than blow cold air. It removes heat from inside your home and sends it outside, while also pulling moisture out of the air. That second part matters more than many people realize. When humidity stays high, your home can feel warmer than the thermostat says, and rooms may feel damp or stuffy even when the system is technically running.

    In most homes, the system depends on several parts working together: the indoor coil, the outdoor condenser, the blower, refrigerant lines, the thermostat, and the ductwork if you have central air. When one part starts slipping, the whole system can lose performance. That is why an air conditioner that still turns on is not always an air conditioner that is working well.

    Common air conditioner problems homeowners notice first

    Most cooling issues start with small warning signs. A system may run longer than usual, cool unevenly, or make a noise that was not there last season. Those early symptoms are worth paying attention to because they often point to a repair that is simpler and less expensive than waiting for a full breakdown.

    Weak airflow is one of the most common complaints. Sometimes the fix is straightforward, such as a clogged filter or blocked supply register. In other cases, the problem comes from a failing blower motor, dirty evaporator coil, or duct issues that keep cool air from reaching the rooms where you need it.

    Warm air coming from the vents can point to thermostat settings, low refrigerant, electrical trouble, or a condenser problem outside. If the outdoor unit is running but the home never cools properly, the issue may be more than one failing part. Cooling systems tend to show wear in layers, especially once they reach the later years of their service life.

    Water around the indoor unit is another problem homeowners should not ignore. Condensate drains can clog, causing water to back up. Left alone, that can damage nearby flooring, walls, or ceilings. If your system is freezing up, turning it off and having it checked is usually the safer move than trying to force it to keep running.

    Repair or replace the air conditioner?

    This is the question many homeowners wrestle with, and the answer depends on age, repair history, energy use, and the condition of the system as a whole.

    If your air conditioner is fairly new, has been reliable, and the repair is isolated, repair often makes sense. Replacing a capacitor, contactor, fan motor, or drain component is very different from dealing with a system that has recurring refrigerant issues or a failing compressor.

    Age matters. Many central air systems last around 10 to 15 years, sometimes longer with good maintenance and favorable operating conditions. But older systems tend to lose efficiency, even before they fully fail. You may notice longer run times, less consistent cooling, and utility bills that keep climbing. At that point, replacement becomes less about avoiding one repair and more about improving comfort and reliability.

    There is also the question of refrigerant type. Some older systems use refrigerants that are increasingly expensive or harder to source. If a major repair is needed on one of those systems, replacement may be the more practical long-term decision.

    The right call is not always the cheapest one today. It is the one that makes sense for your home, your budget, and how much confidence you want in your system when the next heat wave hits.

    Signs your air conditioner is costing you more than it should

    A lot of homeowners assume that if the house eventually gets cool, the system is fine. That is not always true. An air conditioner can keep limping along while quietly wasting energy and putting extra strain on components.

    One sign is short cycling, where the unit turns on and off too often. Another is a system that seems to run constantly on hot days without ever quite catching up. High humidity indoors, uneven temperatures between floors, and a thermostat that never seems to match how the house feels can all point to efficiency and performance problems.

    Sometimes the issue is the equipment itself. Other times, it is the setup around it. Undersized or oversized systems, poor airflow, dirty coils, aging thermostats, or leaky ductwork can all drag down performance. That is why a good diagnosis matters. Replacing parts without understanding the full problem can waste time and money.

    Why sizing and installation matter

    When homeowners think about a new air conditioner, they often focus on brand and price first. Those are reasonable concerns, but proper sizing and installation usually have a bigger impact on comfort and long-term value.

    An oversized system can cool the house too quickly and shut off before removing enough humidity. That leaves the home cool but clammy. An undersized system may run nonstop and still struggle on the hottest days. Neither situation is ideal.

    Installation quality matters just as much. Refrigerant charge, airflow setup, thermostat calibration, electrical connections, drainage, and duct compatibility all affect how the system performs. A high-quality unit installed poorly can deliver disappointing results. A properly selected and carefully installed system is more likely to cool evenly, run efficiently, and last as expected.

    For Massachusetts homeowners, it also helps to think beyond one summer. You want a system that can handle humid stretches, work well with your existing home layout, and make sense alongside your heating equipment and overall energy goals.

    Maintenance that actually makes a difference

    Routine maintenance is not about selling homeowners an extra service they do not need. It is about catching small issues before they turn into expensive ones and helping the system operate the way it was designed to operate.

    A clean filter is the simplest place to start. Restricted airflow can reduce cooling, stress the blower, and contribute to frozen coils. Outdoor units also need clear space around them. If the condenser is crowded by weeds, shrubs, or debris, it has a harder time releasing heat.

    Professional maintenance goes further. It typically includes checking electrical components, inspecting refrigerant performance, cleaning coils when needed, testing the drain system, and making sure the system cycles and cools correctly. These are not just tune-up boxes to check. They are often the difference between a dependable system in July and a no-cooling call during the hottest week of the year.

    Air conditioner comfort is not just about temperature

    Homeowners often call because they want more cooling, but what they are really after is better comfort. That includes temperature, humidity control, airflow, noise level, and how evenly rooms stay comfortable throughout the day.

    If one bedroom is always warmer, or the second floor feels completely different from the first, the answer may not be simply lowering the thermostat. Air balancing, duct improvements, thermostat location, insulation, and system condition can all play a role. The best solution depends on the house.

    That is where working with an experienced local contractor helps. A family-owned company like Mass Plumbing & Heating understands that homeowners are not looking for a lecture or a sales pitch. They want clear answers, reliable work, and a system that does what it is supposed to do when they need it.

    When to call for service

    If your air conditioner is blowing warm air, leaking, making unusual noises, tripping breakers, or failing to keep up, it is smart to have it checked sooner rather than later. The same goes for systems that smell musty, cycle oddly, or suddenly send your electric bill higher than expected.

    Cooling issues rarely improve on their own. Even when the house still feels livable, delaying service can allow a manageable problem to turn into a larger repair. And if your system is older, early attention gives you more time to weigh options rather than making a rushed decision during a breakdown.

    A dependable air conditioner should keep your home comfortable without constant guesswork. If yours is not doing that, the next step is not necessarily replacement, and it is not always a major repair. Often, it starts with a careful diagnosis and an honest conversation about what makes the most sense for your home.

  • Emergency Water Shutoff Tips for Homeowners

    Emergency Water Shutoff Tips for Homeowners

    A burst supply line can turn a normal evening into a soaked floor, stained ceiling, and a long cleanup in minutes. That is why emergency water shutoff tips matter so much. When you know how to stop the flow fast, you give yourself a real chance to limit damage, protect your home, and make the repair process much simpler.

    Most homeowners do not think about shutoff valves until water is already running where it should not be. The best time to learn is before the emergency. If you live in Hudson or the surrounding Massachusetts area, that preparation is especially worthwhile during cold weather, when frozen pipes and sudden leaks become more common.

    Why emergency water shutoff tips matter

    Water damage moves quickly. Drywall absorbs it, flooring traps it, and cabinets can swell before you finish your first phone call. A small leak under pressure can release a surprising amount of water in a short time.

    Knowing where your shutoff valves are and how they work can mean the difference between a manageable repair and a major restoration project. It also helps you stay calmer. In an emergency, simple actions taken in the right order matter more than technical knowledge.

    There is also a trade-off to keep in mind. Shutting off water to one fixture is less disruptive than shutting off the whole house, but it only works if you can safely identify the source and reach that local valve. If the leak is severe, hidden, or near electrical hazards, the main shutoff is usually the safer call.

    Start with the nearest shutoff valve

    If the leak is coming from a toilet, sink, or water heater, look for the closest valve first. Under sinks, you will usually find small shutoff valves on the supply lines. Toilets commonly have a valve on the wall behind or beside the fixture. Water heaters should have a cold-water shutoff on the incoming line above the unit.

    Turn the valve clockwise until it stops. Do not force it. Older valves can stick, and using too much pressure can break the handle or create a bigger problem. If the valve will not move easily, or if water continues flowing after you close it, go straight to the main shutoff.

    This is one of the most useful emergency water shutoff tips for everyday household leaks. A local shutoff can stop the problem without cutting water to the entire home, which is especially helpful if you have a full house and need to keep other fixtures working.

    Know where your main water shutoff is

    Every homeowner should know the location of the main water shutoff before there is an emergency. In many Massachusetts homes, it is found where the main water line enters the house, often in the basement, utility area, or near the water meter. In some homes, there may also be an exterior shutoff at the curb, but that is usually not your first option.

    There are two common valve types. A gate valve usually has a round handle and takes several turns clockwise to close. A ball valve has a lever handle and closes with a quarter turn. If the lever is parallel to the pipe, it is typically open. If it is perpendicular, it is closed.

    Make a point to physically locate this valve, not just assume you know where it is. If your basement is unfinished or your utility area is crowded, clear a path now. In a real emergency, you do not want to move storage bins while water is spreading across the floor.

    What to do the moment you find a leak

    Start by staying clear-headed. If water is near outlets, appliances, or your electrical panel, avoid standing water and do not touch anything electrical in the area. If it is safe to do so, shut off the nearest fixture valve. If not, shut off the main water supply right away.

    Next, open a cold-water faucet at the lowest practical point in the house, such as a basement sink or first-floor faucet. This helps relieve pressure in the plumbing system and drains some remaining water from the lines. If hot water is involved, turn off the water heater as well. For gas units, use the control setting rather than attempting anything more involved unless you are familiar with the system. For electric units, switch off power at the breaker if it is safe.

    Then move quickly to protect what you can. Towels, buckets, and shallow pans can help contain minor leaks. Move rugs, small furniture, paper items, and electronics away from wet areas. Take a few clear photos if possible. That can help with both repair planning and insurance documentation.

    Emergency water shutoff tips for common household problems

    Different leaks call for slightly different responses. A burst pipe is simple in one sense – shut off the main water immediately. Do not waste time trying to patch it first.

    For an overflowing toilet, use the shutoff valve behind the toilet. If the bowl is rising and you cannot stop it fast enough, remove the tank lid and lift the float to stop more water from entering the tank while someone turns the valve. If the toilet keeps running or the valve fails, shut off the main.

    For a leaking water heater, shut off the cold-water supply to the heater first. If the tank itself is leaking, that usually means replacement is not far off. If the leak is from a connection or valve, a repair may be possible, but the first priority is stopping the water and shutting off power or fuel safely.

    For washing machine hose failures, turn off the hot and cold supply valves behind the machine. These leaks can release a lot of water very quickly, especially if a hose bursts while a cycle is running.

    Mistakes homeowners make under pressure

    One common mistake is waiting too long because the leak seems small. A drip from a supply line can become a spray without warning. Another is assuming every fixture has a working shutoff valve. Many older valves do not fully close, and some have not been touched in years.

    Homeowners also sometimes confuse gas shutoffs with water shutoffs, especially near boilers or water heaters. If you are not sure what you are looking at, do not guess. Focus on the water line and the main water valve you have already identified.

    Another issue is forgetting the water heater. After shutting off the main supply, many people stop there. But if the leak involves the heater itself, shutting off its power source is just as important for safety and to protect the equipment.

    How to prepare before an emergency happens

    Preparation does not take long, and it pays off when minutes count. Walk through your home and locate the main shutoff, the water heater shutoff, and the fixture valves under sinks, behind toilets, and behind the washing machine. Make sure adults in the home know where they are.

    Label the main shutoff if it is not obvious. Keep a flashlight nearby if the area is dim. If a valve is badly corroded, hard to access, or clearly in poor condition, have it evaluated before it becomes urgent. Replacing an old shutoff valve is a lot easier during a planned service visit than during a flood.

    It also helps to test your shutoff valves from time to time, but this is one of those it-depends situations. If valves are very old, exercising them without a plan can reveal problems. If you are unsure about their condition, have a licensed plumber inspect them rather than forcing movement.

    When it is time to call a professional

    Shutting off the water is step one, not always the full solution. If a pipe has burst, a valve will not close, the source of the leak is hidden, or water has spread into ceilings, walls, or finished flooring, professional help is the right next step.

    This is especially true if the problem involves a water heater, boiler-adjacent piping, frozen pipes, or repeated leaks. Those systems can have underlying issues that are easy to miss without the right experience. A trusted local expert can stop the immediate problem, identify the cause, and recommend whether repair or replacement makes more sense.

    At Mass Plumbing & Heating, we know most homeowners are not looking to become plumbing experts overnight. They just want clear guidance, a fast response, and confidence that the problem is being handled the right way.

    The best time to learn your shutoff points is when your floors are dry and your stress level is low. A few minutes of preparation now can save you a great deal of damage, expense, and disruption later.