Category: Uncategorized

  • Oil Heating Conversion Example for Homeowners

    Oil Heating Conversion Example for Homeowners

    A lot of homeowners start thinking about fuel conversion after one frustrating winter bill, one aging boiler, or one oil delivery that never feels cheap enough. An oil heating conversion example helps make the decision more real. Instead of talking in general terms, it shows what typically changes in the home, what stays the same, and where the budget usually goes.

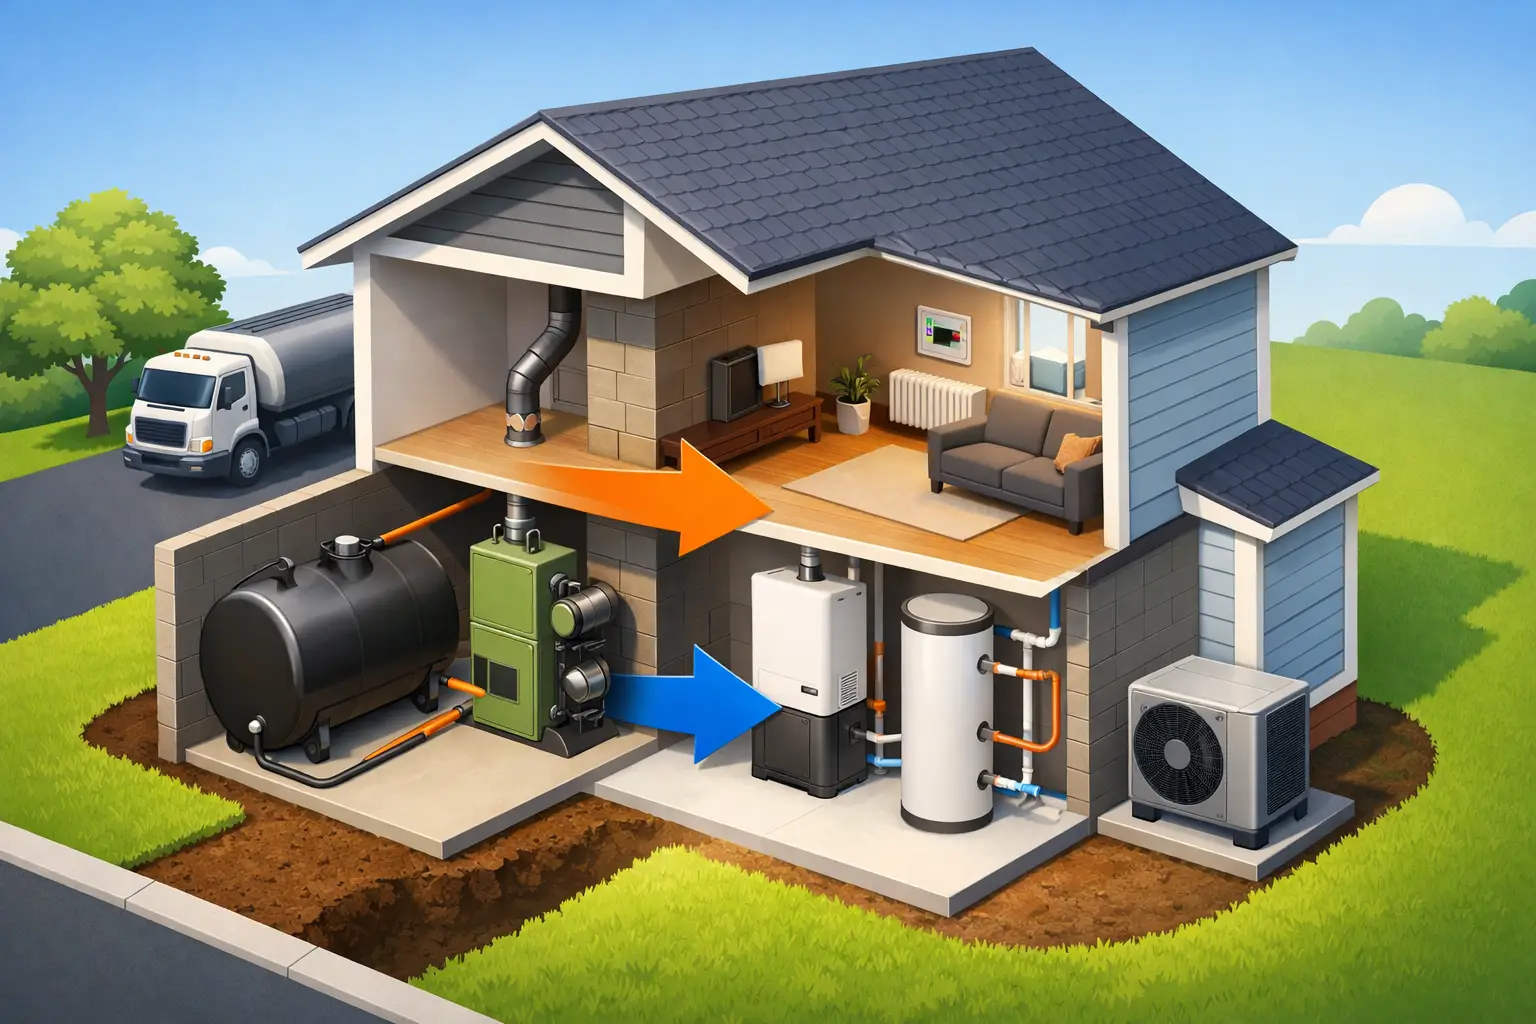
    For many homes in Hudson and nearby Massachusetts communities, the most common conversion is from oil heat to natural gas. Sometimes that means replacing an old oil boiler with a high-efficiency gas boiler. In other homes, it may involve changing the water heater at the same time, removing an old oil tank, and updating venting, piping, and controls so the whole system works safely and efficiently.

    A practical oil heating conversion example

    Picture a 2,000-square-foot colonial with older baseboard heat and a 20-plus-year-old oil boiler in the basement. The home heats well enough, but the boiler is noisy, service calls are becoming more frequent, and winter fuel costs feel unpredictable. The homeowners also have an older standalone water heater that is nearing the end of its life.

    In this oil heating conversion example, the homeowners decide to convert from oil to gas during the off-season rather than waiting for a heating emergency in January. Their existing distribution system – the baseboard piping and heating zones – is still in decent condition, so the project focuses on the equipment and fuel source rather than a full heating redesign.

    The work usually starts with evaluating whether natural gas is available at the street and what the utility requires before service can be brought to the house. Once gas availability is confirmed, the next step is determining whether a boiler replacement makes the most sense or whether a different heating approach is worth considering. In many Massachusetts homes with existing hydronic heat, staying with a boiler is the most practical path because the house is already built around hot water heat.

    What changes during the conversion

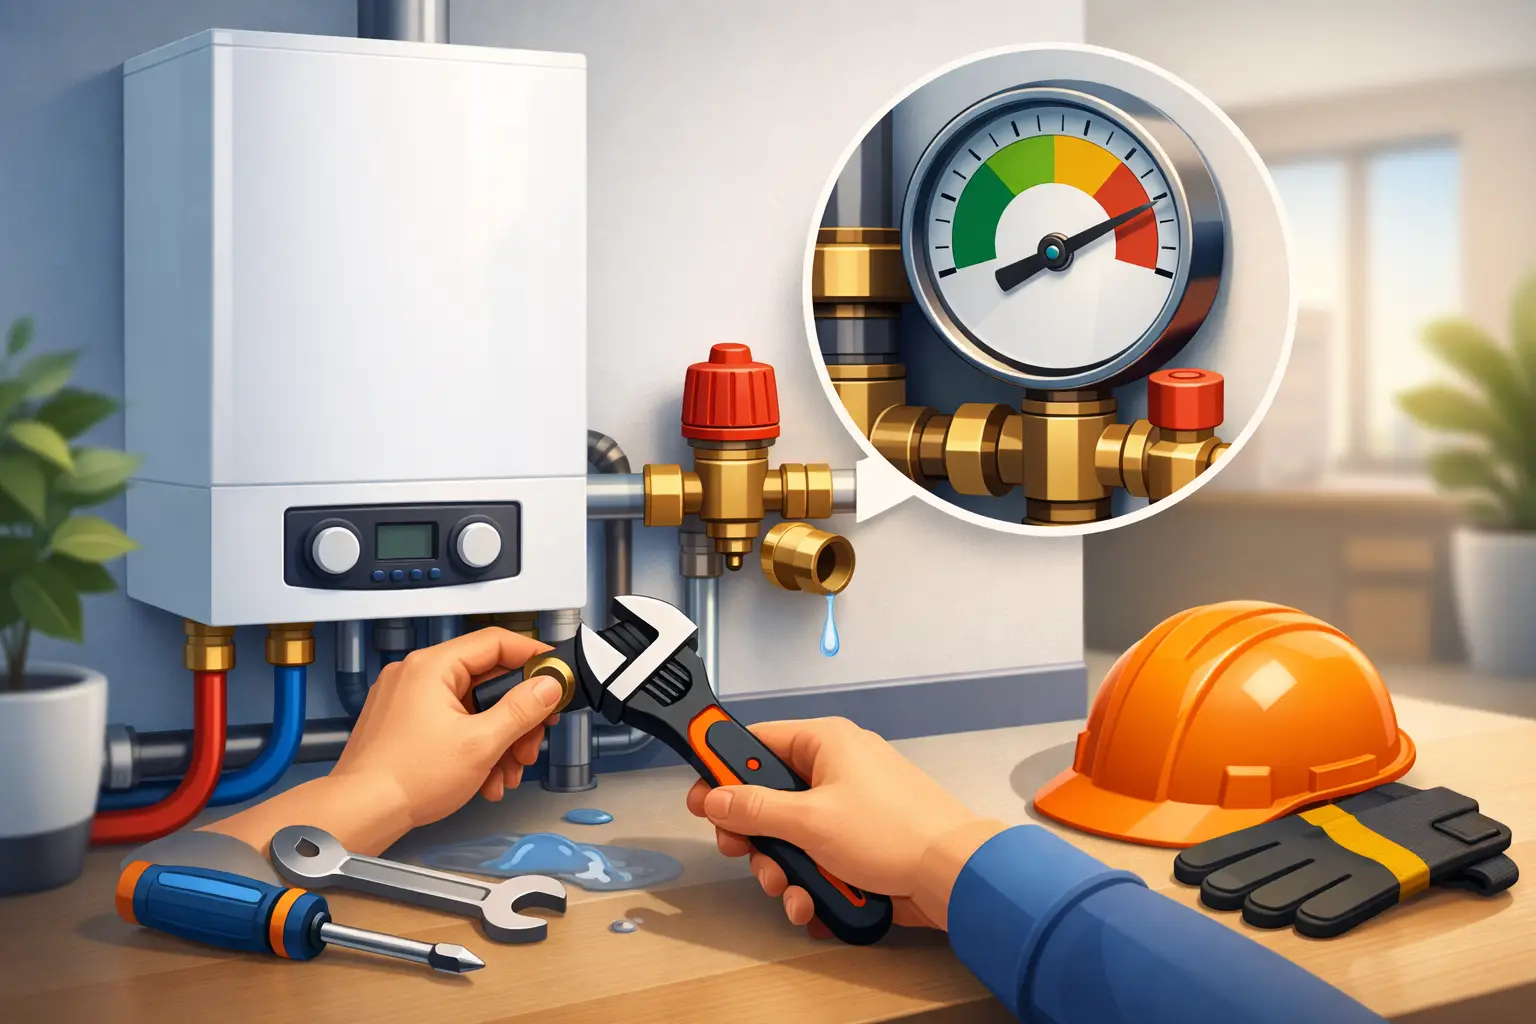
    The old oil boiler is removed, and if there is an oil tank in the basement or outside, that tank is addressed as part of the project plan. A new gas boiler is installed and sized to the home’s heating needs. Proper sizing matters. Bigger is not better. An oversized boiler can short cycle, waste fuel, and wear out sooner.

    The venting system often changes too. Older oil systems may use a chimney setup that is not appropriate for a new high-efficiency gas boiler without modifications. Depending on the equipment selected, the new unit may vent through sidewall piping or require chimney liner work. Gas piping has to be installed to code, and the controls, thermostats, circulators, and safety devices all need to work together with the new boiler.

    If the homeowners want to improve efficiency further, this is also a common time to combine the heating upgrade with an indirect water heater. That setup uses the boiler to heat domestic hot water and can be a smart fit for households that use a lot of hot water. For some families, a separate gas water heater or hybrid option may make more sense. It depends on the home’s layout, usage patterns, and budget.

    Typical costs in an oil heating conversion example

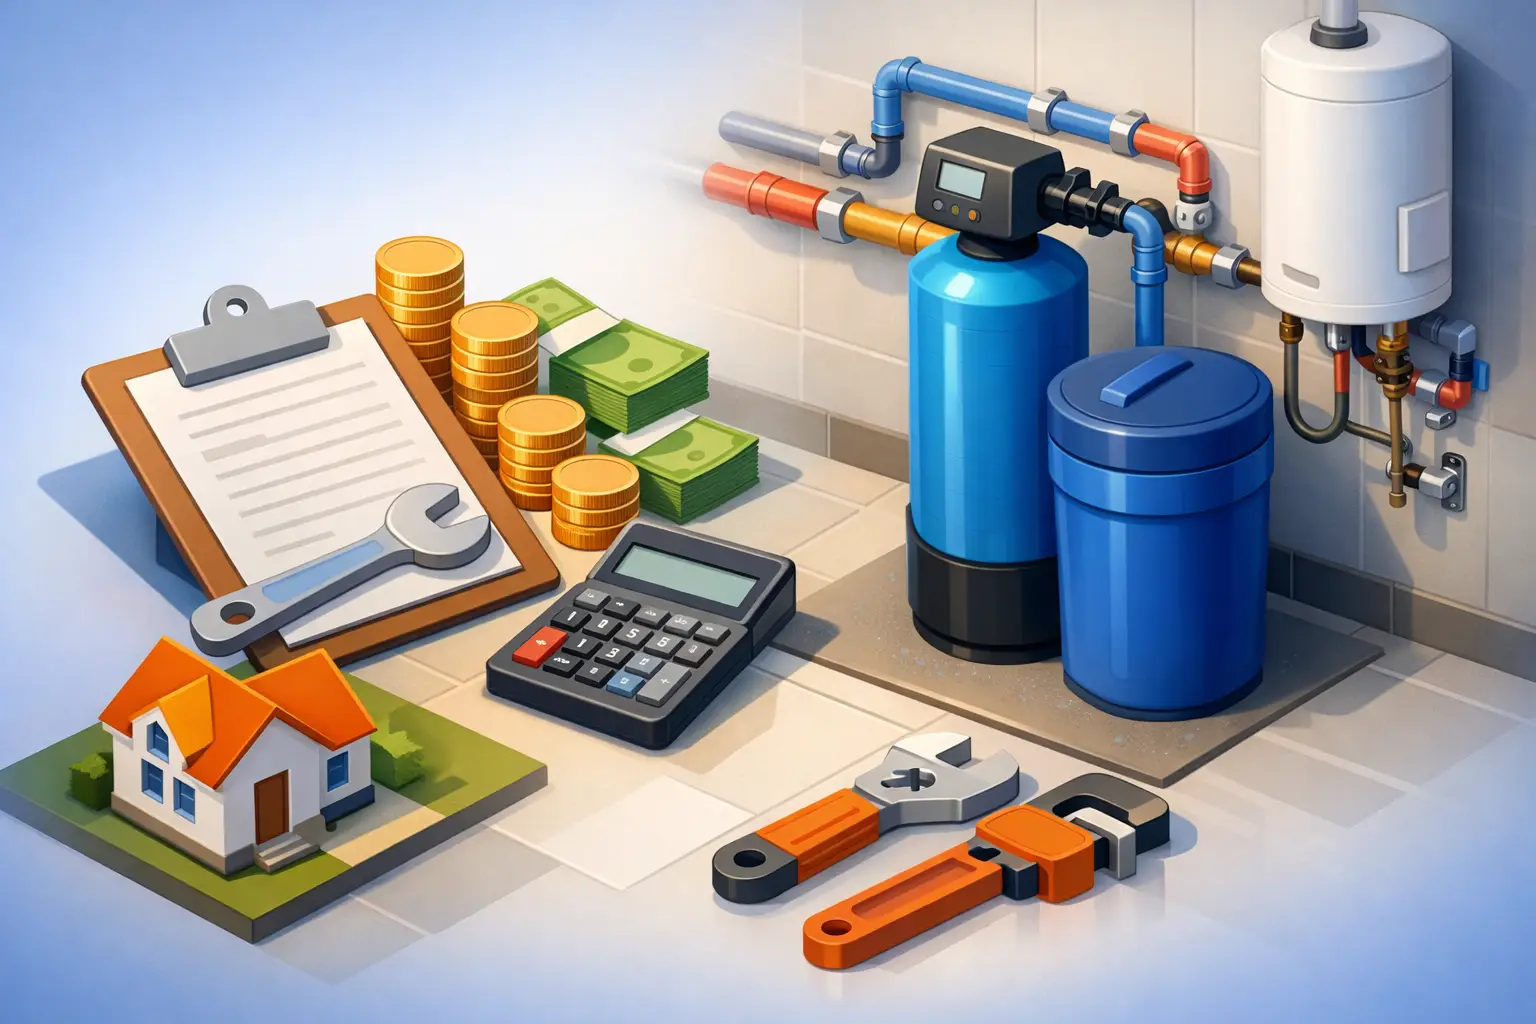
    This is the part homeowners usually want first, and the honest answer is that costs vary quite a bit. A straightforward conversion where gas is readily available, the existing heating distribution is in good shape, and the project only involves boiler replacement will cost less than a job that also needs gas service work, chimney modifications, water heater replacement, oil tank removal, and system repairs.

    In a simple scenario, the investment may center mostly on the new boiler, installation labor, permits, venting, and startup. In a more involved project, costs rise because there are more moving parts and more trades involved. If the old near-boiler piping is in poor condition, if zoning controls are outdated, or if the chimney needs significant work, the estimate will reflect that.

    The most useful way to look at cost is not just upfront price, but total value over time. Homeowners often compare current oil spending, expected repair costs on older equipment, and the benefits of a more efficient gas system. Monthly fuel savings are possible, but they are not identical in every house. Weather, insulation, thermostat settings, and equipment quality all affect the result.

    The trade-offs homeowners should understand

    A good conversion is not just about changing fuel. It is about making sure the new system fits the house. That means being honest about trade-offs.

    Natural gas can offer convenience because homeowners are not scheduling oil deliveries or watching tank levels during cold weather. Modern gas boilers can also provide excellent efficiency and reliable comfort. But a conversion is still a significant project, and it only makes financial sense when the existing oil system is aging, inefficient, costly to maintain, or no longer aligned with the homeowner’s goals.

    There are also homes where conversion is less straightforward. If gas is not available nearby, extending service may not be practical. If the home’s heat distribution is failing, the project may be larger than expected. And if the oil boiler is relatively new and operating efficiently, the payback may not be as strong as it would be with older equipment.

    That is why a site-specific evaluation matters more than broad promises. The best answer is based on the actual house, not a one-size-fits-all sales pitch.

    Oil heating conversion example: timeline and process

    Most homeowners want to know how disruptive the work will be. In many cases, the physical installation can be completed within a few days, but the full timeline depends on equipment availability, permitting, utility coordination, and whether additional work is needed.

    A planned conversion usually follows a clear path. First comes the in-home assessment to review the existing boiler, heat emitters, fuel setup, venting, and hot water needs. Then the contractor builds a scope of work and confirms equipment selection. If gas service needs to be brought to the home, there may be utility scheduling involved before installation can begin.

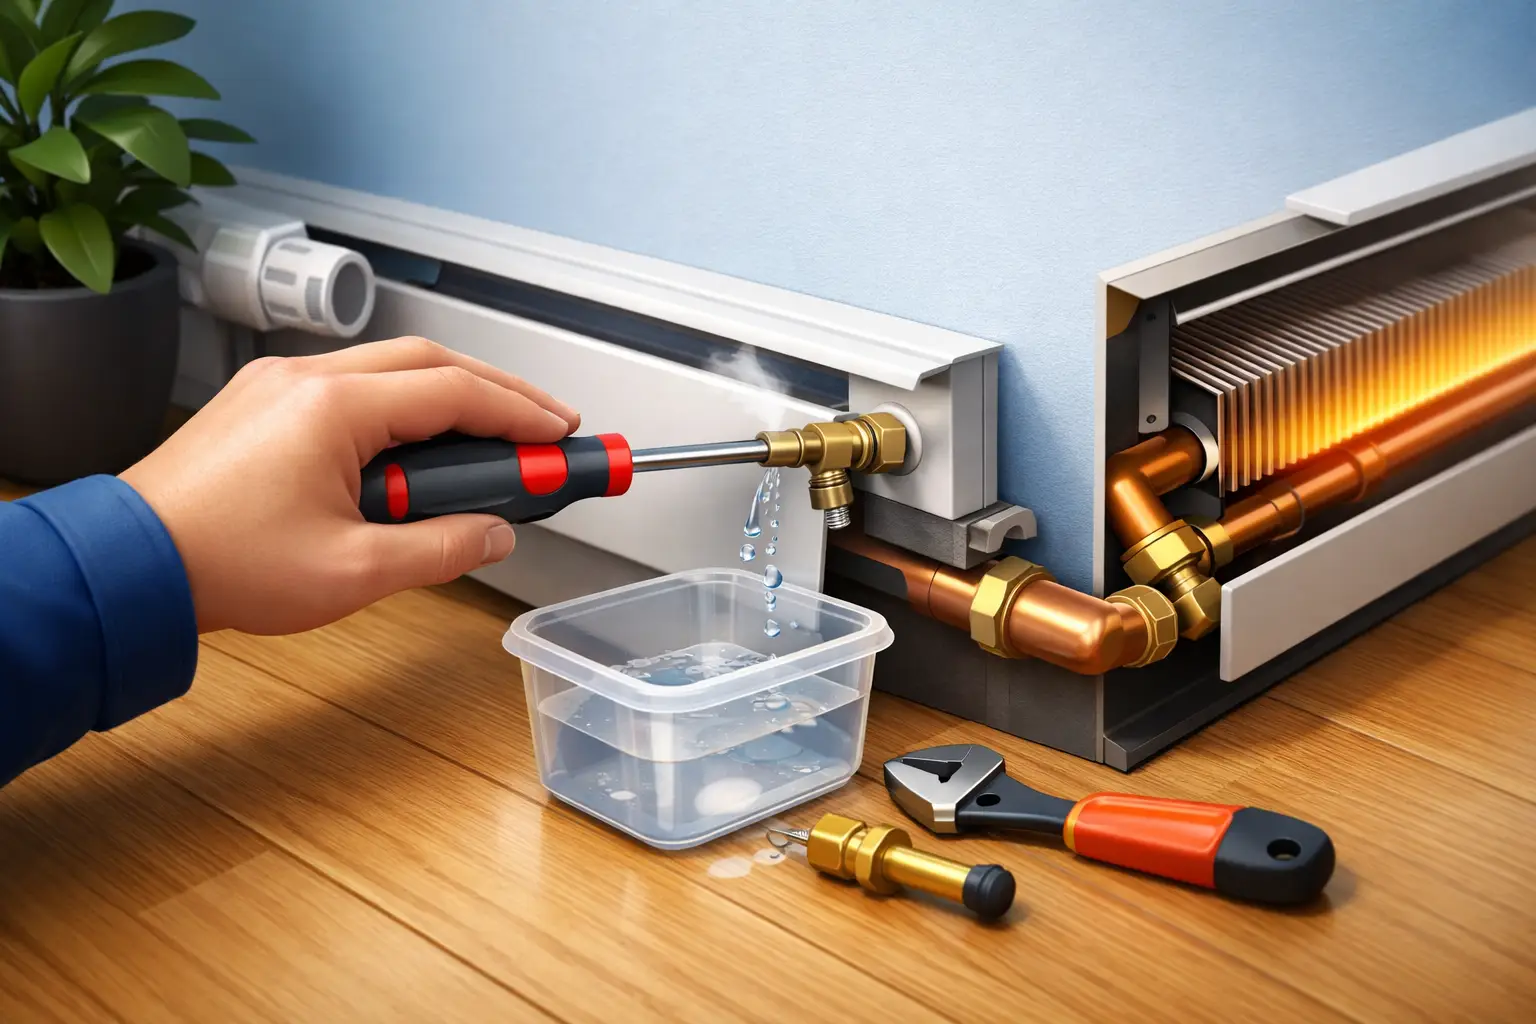
    Once the project starts, the old oil equipment is disconnected and removed. The new boiler and related components are installed, piped, vented, wired, filled, tested, and tuned. At the end, the system should be walked through with the homeowner so they understand basic operation, maintenance needs, and what to watch for over time.

    That last step matters. A conversion is not just a swap. Homeowners should know how to run the system efficiently and when to schedule service. Good installation and clear communication go hand in hand.

    When an oil-to-gas conversion makes the most sense

    The strongest candidates for conversion are usually homeowners dealing with an old oil boiler, rising repair frequency, unstable heating performance, or the inconvenience of oil deliveries. The project also makes sense when someone already plans to replace major heating equipment and wants to improve efficiency at the same time.

    For Massachusetts homeowners, another factor is long-term planning. If you expect to stay in the house for years, a well-designed conversion can improve comfort, simplify fuel management, and reduce the chance of a mid-winter breakdown with equipment that has already had a long service life.

    If you are planning other upgrades, such as a new water heater, heating zone improvements, or boiler controls, it can be more efficient to bundle those decisions into one project. A family-owned company like Mass Plumbing & Heating can often help homeowners look at the full picture instead of only the boiler itself.

    Questions worth asking before you move forward

    Before approving any conversion, ask how the new boiler is being sized, what venting changes are required, whether the existing distribution system is in good condition, and what happens with the old oil tank. You should also ask how domestic hot water will be handled after the upgrade and what maintenance the new system will need.

    Those questions do two things. They help you compare proposals fairly, and they make it easier to spot when an estimate leaves out important parts of the job. The lowest number on paper is not always the best value if key upgrades are missing.

    A well-planned oil heating conversion should leave you with a safer, cleaner, and more dependable system that fits the home you actually live in. If you are weighing your options, the best next step is a clear assessment of your current setup, your fuel access, and how long you want the new system to serve your household. A real answer starts with the house in front of you, not a generic promise.

  • How to Fix Boiler Pressure Safely

    How to Fix Boiler Pressure Safely

    A boiler that suddenly drops pressure has a way of getting your attention fast – especially on a cold Massachusetts morning when the heat should be steady and dependable. If you are searching for how to fix boiler pressure, the good news is that some pressure problems are simple to identify. The bigger issue is knowing when it is a quick homeowner adjustment and when it points to a leak, failed part, or system problem that needs professional repair.

    Boiler pressure matters because your heating system needs the right amount of water pressure to circulate hot water properly through baseboards, radiators, or radiant heat loops. Too low, and your boiler may stop heating efficiently or shut itself down. Too high, and the system can strain parts that are meant to operate within a safe range.

    What normal boiler pressure should look like

    Most residential boilers run best when the pressure gauge reads around 1 to 1.5 bar when the system is cool, or roughly 12 to 15 psi on systems with a psi gauge. When the boiler heats up, it is normal for pressure to rise somewhat. That said, it should not climb so high that it approaches the relief valve setting.

    If your gauge is well below the normal range, that usually means the system needs water added or there is a reason pressure is being lost. If it is too high, adding water is not the answer. High pressure usually points to overfilling, expansion tank trouble, or another control issue.

    How to fix boiler pressure when it is too low

    Low boiler pressure is the most common problem homeowners notice. It may show up as a pressure reading near zero, cold spots in the house, a boiler fault code, or the system not turning on at all.

    Before you do anything, turn down the thermostat and let the boiler cool if it has been running. You do not want to make adjustments while pressure is already elevated from heat.

    Check the gauge first

    Start with the pressure gauge on the front or side of the boiler. Some gauges use psi, others use bar. If the reading is clearly below the recommended operating range listed on the unit or in the manual, the system may need to be repressurized.

    Take a quick look around the boiler and any visible piping for signs of leakage. Even a small drip from an air vent, circulator, relief valve, or nearby fitting can slowly pull pressure down over time. If you see active leaking, rust streaks, water stains, or puddling, it is better to stop there and arrange a repair rather than simply refilling the system again.

    Use the fill valve carefully

    Many hydronic boilers have a manual feed valve or filling loop that lets fresh water into the system. The exact setup varies by boiler age and brand, so this is where a little caution goes a long way. Opening the valve too fast or too long can send the pressure too high.

    If your system has a clearly labeled fill valve, open it slowly while watching the gauge. Bring the pressure up gradually to the recommended cold pressure, usually around 12 to 15 psi. Then close the valve fully. Give the system a minute and confirm the gauge stabilizes where it should.

    If you are not sure which valve is the feed valve, do not guess. Opening the wrong valve can create a bigger problem quickly.

    Restart the boiler if needed

    Some boilers recover on their own once pressure returns to normal. Others need a reset. If your unit has locked out, follow the manufacturer instructions for resetting it. If it starts and runs normally, keep an eye on the gauge over the next day or two.

    A one-time pressure drop can happen after bleeding radiators or minor maintenance. Repeated pressure loss is different. If the boiler keeps dropping, water is leaving the system somewhere, and that needs to be found.

    How to fix boiler pressure when it is too high

    High pressure deserves just as much attention. Homeowners sometimes notice the gauge creeping into the red zone, water dripping from a relief pipe, or pressure that rises sharply every time the boiler heats up.

    If your boiler pressure is too high, the first thing to know is that the fix is not always as simple as letting water out. You can lower the reading temporarily, but if the cause is still there, the pressure will come right back.

    Make sure the system was not overfilled

    If you recently added water and now the pressure is high, the most likely explanation is overfilling. In some cases, bleeding a radiator or draining a small amount of water from the system can bring pressure back down. This should be done carefully, with the boiler cooled off, and only if you are comfortable with the process.

    The risk is that homeowners sometimes lower the pressure too much, then add more water again, and the system ends up cycling between low and high pressure without solving the root issue.

    Consider the expansion tank

    One common cause of high boiler pressure is a waterlogged or failed expansion tank. The expansion tank is there to absorb the natural increase in water volume as the system heats up. If it is not working properly, pressure rises too quickly when the boiler runs.

    This is not always obvious from the outside. You may only notice that pressure looks normal when the system is cold, then jumps much higher during a heating cycle. That pattern is a strong clue that the expansion tank should be checked.

    Watch the relief valve

    If the pressure relief valve is discharging water, that is not something to ignore. The valve is doing its job by preventing unsafe pressure buildup, but it is also telling you something is wrong. A relief valve may leak because pressure is too high, or it may be weakened after repeated discharges and no longer seal properly.

    Either way, if water is coming from the relief line, it is time for professional service.

    When low pressure means there is another problem

    A boiler that needs to be topped off once in a long while is one thing. A boiler that regularly loses pressure is another. In those cases, repressurizing is only a temporary step.

    Leaks are a common reason. Some are easy to spot near the boiler. Others are hidden in heating loops, behind finished walls, or under floors. Air vents, purge valves, circulators, zone valves, and older fittings can also seep slowly enough that the problem goes unnoticed until pressure drops again.

    There is also the possibility of an issue inside the boiler itself, such as a failing heat exchanger on certain systems. That is not a DIY diagnosis, and it is one reason repeated pressure loss should not be brushed off.

    A few boiler pressure mistakes to avoid

    The biggest mistake is treating the gauge like a reset button. If pressure drops and you simply add water every few days, you may be masking a leak that is getting worse. Fresh water also introduces minerals and oxygen into the system, which can contribute to corrosion over time.

    Another mistake is adjusting valves without being sure what they do. Boiler piping can be confusing, especially on older systems with added components, mixing valves, or multiple heating zones. One wrong turn can shut off the water feed, overfill the boiler, or create a mess.

    It is also wise not to ignore the age of the system. Older boilers can develop pressure issues that are tied to worn controls, aging tanks, or failing valves. In those cases, a repair is often straightforward, but only after the actual cause is identified.

    When to call a professional for boiler pressure issues

    If you are comfortable checking the gauge and adding water through a clearly marked fill valve, that may be all you need for a one-time low-pressure event. Beyond that, professional service is the safer move.

    Call for help if the pressure keeps dropping, rises into a high range repeatedly, leaks are visible, the relief valve is dripping, or the boiler shuts down and will not restart. The same goes for any system making unusual noises, showing error codes, or leaving parts of the home without reliable heat.

    For homeowners in Hudson and nearby communities, pressure problems often show up right when the system is working hardest. That is exactly when dependable local service matters. A trained technician can check the expansion tank, feed valve, pressure reducing valve, relief valve, air elimination components, and the system itself to find out why the pressure is off instead of just chasing the symptom.

    If you are not sure how to fix boiler pressure safely, trust that instinct. A heating system should give you confidence, not force you into guesswork. Sometimes the smartest fix is a careful inspection now, before a small pressure problem turns into a no-heat call at the worst possible time.

  • Homeowner Guide to Water Filtration

    Homeowner Guide to Water Filtration

    That white buildup on a faucet, the chlorine taste in a glass of water, the orange stain in a sink – those are often the first signs that your home’s water may need attention. This homeowner guide to water filtration is meant to help you sort out what matters, what doesn’t, and how to choose a system that actually fits your house.

    Water filtration is not one-size-fits-all. A setup that makes sense for one home in Massachusetts may be unnecessary in the next, even on the same street. The right choice depends on your water source, the specific problems you are trying to solve, your plumbing system, and how much maintenance you are willing to take on.

    Why a homeowner guide to water filtration matters

    Many homeowners start looking at water filtration after noticing a taste or odor issue. Others are dealing with harder water, staining, sediment, or concerns about what may be in their drinking water. The challenge is that different water problems require different solutions, and the wrong equipment can leave you paying for a system that does not address the real issue.

    That is why testing comes first. If you are on municipal water, your treatment needs may be different from a private well. City water is typically disinfected, so chlorine or chloramine taste can be common. Well water often raises concerns about iron, manganese, sediment, sulfur smell, acidity, or naturally occurring minerals. In either case, the best filtration plan starts with identifying what is actually in the water and what level is present.

    A good water filtration setup can improve taste, reduce odors, protect plumbing fixtures, extend the life of appliances, and make everyday use more comfortable. It can also help reduce wear on water heaters, dishwashers, and washing machines when hardness or sediment is part of the problem. But filtration is not magic. Some systems target aesthetics, some target health-related contaminants, and some are designed mainly to protect your plumbing.

    Common water problems homeowners run into

    The most common issue is hard water. Hard water contains dissolved minerals, mainly calcium and magnesium. It is not usually a health concern, but it can leave spots on dishes, scale inside pipes, soap residue in showers, and mineral buildup in water-using appliances. If your water heater is working harder because of scale, that can affect efficiency over time.

    Another common complaint is chlorine taste or smell. Municipal water is treated for safety, but the disinfectant can affect how the water tastes at the tap. This is one reason many homeowners choose basic carbon filtration for drinking water or even for the whole house.

    Sediment is also common, especially in homes with well water or older service lines. Sand, silt, and other particles can clog fixtures, wear down valves, and make water look cloudy. In those cases, a sediment filter is often the first stage, not the full answer.

    Then there are nuisance minerals and compounds such as iron, manganese, and sulfur. Iron can leave reddish-brown staining. Manganese can cause dark staining. Sulfur often creates a rotten egg odor. These problems need targeted treatment. A standard carbon filter may not be enough.

    Types of water filtration systems

    The term water filtration covers several different categories. That is where homeowners can get tripped up, because a system that works well for one issue may do very little for another.

    Point-of-use systems

    Point-of-use systems treat water at a single location, usually a kitchen sink or refrigerator line. These are often used when the main goal is better drinking water. Under-sink filters and reverse osmosis systems fall into this category.

    Carbon filters are a common point-of-use option because they are effective for improving taste and reducing certain odors. They are often a smart fit if your main complaint is chlorine flavor from municipal water.

    Reverse osmosis systems go further. They use a membrane to reduce a wider range of contaminants and are often chosen by homeowners who want highly treated drinking water. The trade-off is that they are more complex, produce some wastewater during operation, and require regular filter and membrane maintenance.

    Whole-house systems

    Whole-house systems treat water as it enters the home. This approach makes sense when the issue affects more than drinking water, such as hard water, sediment, odor, or staining throughout the house.

    A sediment pre-filter can help protect fixtures and downstream equipment. A whole-house carbon filter can improve taste and odor across all taps. Water softeners are used when hardness is the main problem. Specialized treatment systems can address iron, manganese, sulfur, or acidity when those show up in testing.

    Whole-house treatment usually costs more upfront, but it can protect appliances, improve bathing and laundry performance, and address water quality issues in every room instead of just at one sink.

    Water filtration vs. water softening

    This is one of the biggest points of confusion for homeowners. A water softener is not the same thing as a standard water filter.

    Water softeners are designed to remove hardness minerals. They help reduce scale buildup, spotting, and soap scum. They are the right solution for hard water, but they are not necessarily meant to remove chlorine, sediment, or every contaminant a homeowner may be worried about.

    Water filters, depending on the media and design, may target sediment, taste, odor, or specific contaminants. In many homes, the best setup is not either-or. It is a combination, such as a sediment filter and softener, or a whole-house treatment system paired with an under-sink drinking water filter.

    How to choose the right setup for your home

    The best homeowner guide to water filtration should be honest about this: it depends. There is no single “best” system without knowing what your water is doing.

    Start with the source. If you have city water, look at taste, odor, chlorine, and any concerns tied to older plumbing or local water conditions. If you have well water, testing becomes even more important because well water quality can vary significantly and is the homeowner’s responsibility.

    Next, think about where the problem shows up. If only the drinking water bothers you, a point-of-use system may be enough. If you are seeing scale on fixtures, staining in toilets, or sediment throughout the house, whole-house treatment is usually the better path.

    Then consider maintenance. Every system needs some level of upkeep. Cartridges need replacement. Softeners need salt. Reverse osmosis systems need periodic service. A lower-cost system that never gets maintained is not a bargain. It is better to choose equipment you can realistically keep up with.

    Finally, think about plumbing compatibility and space. Some systems need drains, electrical connections, or room near the main water entry point. Others may affect water pressure if not sized correctly. This is where professional guidance can save time and prevent expensive mistakes.

    What installation and maintenance really look like

    Water filtration works best when it is installed properly and sized for the home. An undersized system may struggle with flow rate. An oversized or misapplied one may cost more without delivering added value. If your home has multiple bathrooms, high water demand, or older plumbing, those details matter.

    Maintenance is not complicated, but it is essential. Sediment filters can clog over time. Carbon media loses effectiveness. Water softeners need to be checked for proper regeneration. Reverse osmosis systems need routine cartridge changes and occasional membrane replacement.

    A neglected system can lead to poor performance and, in some cases, create its own issues. That is why many homeowners prefer to have treatment equipment inspected during regular plumbing service, especially if the system has been in place for years.

    When it makes sense to call a professional

    If you are choosing between a few pitchers or faucet filters, that is usually a simple retail decision. But if you are seeing whole-house symptoms, recurring staining, persistent odor, appliance scale, or water quality issues you cannot identify, it is worth having the situation evaluated.

    A professional can help connect the dots between your water quality, your plumbing system, and the treatment options that make sense for your home. That can prevent overbuying, underbuying, or installing the wrong type of equipment. For homeowners in Hudson and surrounding communities, Mass Plumbing & Heating often sees cases where the problem was not filtration in general, but a mismatch between the water issue and the solution chosen.

    A good recommendation should be clear and practical. You should understand what the system is supposed to fix, what it will not fix, what maintenance it needs, and what the long-term costs look like.

    Clean, reliable water affects more than what comes out of a kitchen tap. It touches your plumbing, your appliances, your comfort, and the way your home runs every day. The right filtration plan is the one that fits your water, your home, and your priorities – not the one with the most features on the box.

  • Leaking Water Heater Warning Signs to Watch

    Leaking Water Heater Warning Signs to Watch

    A small puddle around the water heater usually does not stay small for long. What starts as a drip can turn into flooring damage, mold, a failed tank, or a no-hot-water problem at the worst possible time. Knowing the leaking water heater warning signs can help you act early, protect your home, and avoid a bigger repair than necessary.

    Some leaks are minor and repairable. Others mean the tank is nearing the end of its life and replacement is the safer choice. The key is knowing what you are seeing and not waiting too long to have it checked.

    The most common leaking water heater warning signs

    The clearest sign is visible water near the base of the unit, but that is not the only thing to watch for. In many homes, a water heater starts giving clues before the leak becomes obvious.

    You might notice damp concrete, staining around the unit, rust on nearby pipes, or a musty smell in the utility area. Some homeowners first spot corrosion around the tank fittings or hear a slight hissing sound when the burner or heating elements are not running. If the tank sits in a pan, water collecting there is an early warning that should never be ignored.

    Another common sign is inconsistent hot water along with moisture around the heater. That combination can point to internal wear, valve problems, or sediment buildup that has started to affect performance. When a water heater leaks and also struggles to keep up, it often means the problem has been developing for a while.

    Where the leak is coming from matters

    Not every water heater leak means the tank itself has failed. That is why location matters.

    Water on top of the unit

    If you see water on top of the heater or running down from above, the issue may be at the cold water inlet, hot water outlet, or nearby pipe connections. In some cases, the leak is coming from plumbing above the tank and only appears to be a water heater problem. These are often more manageable repairs if caught early.

    Water around the pressure relief valve

    The temperature and pressure relief valve is a safety device. If it is dripping, the valve may be faulty, pressure may be too high, or the tank may be overheating. A small amount of discharge is not something to shrug off. This is a safety issue, not just a nuisance leak.

    Water from the drain valve

    A loose or worn drain valve can drip slowly and create a puddle near the bottom of the tank. Sometimes the valve just needs to be tightened or replaced. Sometimes sediment has damaged the seal. It is usually less serious than a tank crack, but it still deserves prompt service.

    Water at the bottom of the tank

    This is the one homeowners worry about most, and for good reason. If water appears to be seeping from the tank body itself, the inner tank may be rusted through. Once the tank has failed internally, repair is generally not a long-term option. At that point, replacement is usually the practical and safer move.

    Signs the tank may be failing from the inside

    A leaking tank often shows wear before it fully lets go. Rust-colored water at the tap, popping or rumbling sounds, and reduced hot water capacity can all point to sediment and internal corrosion. These issues are especially common in older tank-style heaters.

    As sediment collects at the bottom, the heater has to work harder. That extra strain can overheat the tank bottom, weaken components, and shorten the life of the system. If your water heater is older and now showing both performance problems and moisture, it is worth taking seriously.

    Age matters here. Many standard tank water heaters last around 8 to 12 years, depending on water quality, maintenance, and usage. That does not mean every unit fails on schedule, but once a tank reaches that general range, leaking becomes a more likely sign of overall wear rather than a one-off repair.

    Leaking water heater warning signs that need fast attention

    Some situations can wait a day for a scheduled appointment. Others call for immediate action.

    If you see active dripping that is getting worse, hear unusual pressure-related sounds, smell gas near a gas water heater, or notice water spreading toward finished areas, electrical equipment, or stored belongings, do not wait. A leaking water heater can damage much more than the appliance itself.

    The same is true if the leak is paired with discolored water, a sudden loss of hot water, or visible corrosion on the tank body. Those signs suggest the issue may be deeper than a loose connection. For households in Massachusetts, where basements often hold heating equipment, laundry areas, storage, and utility systems together, one neglected leak can affect a lot in a short amount of time.

    What you can do right away

    Homeowners do not need to diagnose every component, but a few simple steps can reduce damage before a plumber arrives.

    First, look carefully to confirm whether the water is actually coming from the heater. Condensation, a nearby plumbing leak, or even a furnace or boiler issue in the same area can create confusion. If the source appears to be the water heater, turn off the power to the unit. For an electric heater, switch it off at the breaker. For a gas unit, use the shutoff if you know how to do so safely.

    Next, shut off the water supply to the heater. Most units have a cold water shutoff valve on the line above the tank. Stopping incoming water can limit further leaking. If water is pooling, move nearby items and dry the area as best you can to reduce damage and slipping hazards.

    What you should not do is ignore it for a few days to see if it gets better. Water heater leaks rarely fix themselves. Temporary slow drips often turn into bigger failures.

    Repair or replacement depends on the cause

    This is where a professional inspection matters. A leaking fitting, valve, or connector may be a straightforward repair. A failed tank is a different story.

    In general, repair makes sense when the leak is isolated to a serviceable part and the unit is still in otherwise solid condition. Replacement makes more sense when the tank is older, corrosion is widespread, or the leak is coming from the tank body. It also makes sense when repair costs are getting too close to the value of a newer, more efficient system.

    For some homeowners, a leak becomes the moment to consider an upgrade. If your current water heater is undersized, inefficient, or unreliable, replacing it with a properly sized standard, high-efficiency, hybrid, or tankless model may solve more than one problem at once. The right choice depends on household size, fuel source, budget, and how much hot water your home uses at peak times.

    Why maintenance makes a difference

    Not every leak can be prevented, but some can. Routine inspection helps catch corrosion, loose connections, pressure issues, and sediment buildup before they lead to major damage.

    Periodic flushing, checking the anode rod, and making sure safety valves and connections are in good condition can extend the life of a tank-style water heater. Homes with harder water often benefit even more from regular maintenance because mineral buildup tends to happen faster. If a heater is tucked away in a basement or utility room, it is easy to forget about it until there is a problem. A quick look every so often can save a lot of trouble.

    For local homeowners, having one trusted contractor who understands both plumbing and heating systems can also make a difference. In many homes, water heater problems are tied to broader system conditions such as pressure issues, aging shutoff valves, venting concerns, or drainage around the equipment.

    When to call a professional

    If you see water around your heater and you are not completely sure of the cause, it is time to call. The sooner the source is identified, the better your chances of limiting damage and avoiding an emergency replacement.

    A professional can determine whether the issue is a simple valve or connection, a safety concern, or a tank failure. They can also tell you whether repair is worth it or whether replacement will save you more stress and expense in the near future. For homeowners who need prompt, local help, Mass Plumbing & Heating understands how quickly a water heater leak can go from manageable to urgent.

    A water heater usually gives some warning before a major failure. If you notice moisture, rust, odd noises, or declining hot water, trust what your home is telling you and get it checked before a small leak becomes a much bigger mess.

  • Why Does Hot Water Smell in Your Home?

    Why Does Hot Water Smell in Your Home?

    You turn on the shower or kitchen sink, and the smell hits right away – rotten eggs, metal, mustiness, or something just plain off. If you’re asking why does hot water smell, the first thing to know is that the odor usually points to a specific issue in your water heater, plumbing, or water supply. The good news is that many of these problems are fixable once you know where the smell is coming from.

    Hot water odor is not one-size-fits-all. The type of smell matters, whether it happens at one faucet or throughout the house matters, and whether cold water smells too matters most of all. Those details help narrow down whether you’re dealing with a water heater issue, bacteria, mineral content, aging plumbing, or something outside the home.

    Why does hot water smell worse than cold water?

    Hot water tends to release odors more noticeably because heat makes dissolved gases and compounds come out of the water faster. A smell that is mild in cold water can become much stronger once the water heats up. That is why many homeowners only notice the problem in the shower, at the bathroom sink, or when running hot water for dishes.

    In many cases, the water itself is not newly contaminated when it gets hot. The heat is just making an existing issue easier to detect. If the smell appears only on the hot side, the water heater becomes the first place to investigate.

    The most common reason hot water smells like rotten eggs

    That sulfur or rotten egg smell is one of the most common complaints homeowners have. In many homes, the cause is a reaction inside the water heater involving sulfate in the water and the anode rod in the tank. The anode rod is there to help protect the tank from corrosion, but under certain conditions it can contribute to a sulfur smell.

    Bacteria can also play a role. Sulfate-reducing bacteria are not unusual in some water supplies, and they can produce hydrogen sulfide gas. That gas creates the classic rotten egg odor. Warm water and a storage tank can make the smell stronger because they create an environment where the reaction becomes more noticeable.

    This does not always mean the water heater is failing, but it does mean the system should be checked. Sometimes the fix involves replacing the anode rod with a different type, flushing the tank, disinfecting the heater, or addressing water quality more directly.

    If hot water smells metallic or like pennies

    A metallic smell often points to minerals or corrosion. Homes with older plumbing may notice this more, especially if pipes have begun to wear internally. If the water heater tank or fittings are corroding, that can affect odor and taste too.

    Iron and manganese in the water supply can also create a metal-like smell or taste. In some cases, homeowners describe it as rusty, earthy, or similar to blood or coins. If the odor appears in both hot and cold water, the source may be your incoming water rather than the heater alone.

    There is some nuance here. A brief metallic smell at one faucet may be a local fixture issue. A stronger house-wide odor that has gotten worse over time usually deserves broader testing and inspection.

    Musty, earthy, or stale hot water odors

    A musty smell can come from bacteria, organic material in the water, or buildup in plumbing fixtures. Sometimes the water is not the real problem at all. Drain odors can rise when warm water runs, making it seem like the hot water itself smells bad.

    This is especially common around bathroom sinks, tubs, and showers. Biofilm can build up in the drain or overflow area, and when hot water runs over it, the smell becomes stronger. If only one fixture smells, the drain is a strong suspect. If every hot water tap smells similar, the water heater or water supply is more likely.

    Why does hot water smell only at one faucet?

    When the smell is isolated to a single sink or shower, the issue is usually local. It could be a dirty aerator, buildup in the faucet, a drain problem, or a short section of aging pipe serving that fixture. In that case, replacing the water heater would not solve anything.

    A simple check can help. Fill one clean glass with hot water directly from the tap, taking care not to let it run into the drain, then smell the water. Next, smell near the drain itself. If the drain smells stronger than the water in the glass, the plumbing at that fixture may be the real source.

    When cold water smells too

    If both hot and cold water have the same odor, the water heater may be innocent. The issue may come from the well or municipal water supply, the home’s main water line, or a whole-house water quality concern.

    For homeowners on well water, sulfur bacteria, iron bacteria, and mineral content are common factors. For municipal water users, seasonal water chemistry changes or reactions within the home’s plumbing can sometimes create odor. The key difference is consistency. If the smell is present on both sides and at multiple fixtures, the investigation should start beyond the heater.

    What your water heater may be telling you

    A water heater can contribute to odor without showing dramatic signs of failure. Sediment buildup inside the tank can trap bacteria and minerals. An aging anode rod can create chemical reactions that affect smell. A heater that has not been flushed regularly may be more likely to develop odor problems over time.

    That said, not every smelly water heater needs replacement. Sometimes professional maintenance solves the problem. Other times, especially with older units, recurring odor may be one more sign that replacement is the smarter long-term choice.

    If your hot water also looks discolored, runs out too quickly, makes popping noises, or leaks, those symptoms should be taken seriously. Odor by itself is one issue. Odor paired with performance problems usually means a closer inspection is overdue.

    Why does hot water smell after the house sits unused?

    If the smell is strongest after a vacation or a period of low water use, stagnant water may be part of the problem. Water sitting in pipes or a tank can allow odors to develop or become more concentrated. Once the system is used regularly again, the smell may improve.

    Still, temporary improvement does not always mean the root cause is gone. A heater with sediment buildup or bacteria can keep producing the same issue later. If this happens more than once, it is worth having the system evaluated rather than waiting for it to become a bigger problem.

    What homeowners can try first

    There are a few practical checks that can help narrow things down before calling for service. See whether the smell happens only with hot water or with both hot and cold. Check whether it affects one fixture or the whole house. Notice whether the smell is sulfur-like, metallic, musty, or chemical.

    You can also clean faucet aerators and compare the smell of water in a glass to the smell near the drain. These are simple steps, but they help separate a fixture problem from a system-wide one.

    What you should not do is guess with aggressive chemical treatments or ignore the issue for months. Water heaters, plumbing materials, and water chemistry all interact differently, and the wrong fix can waste time and money.

    When to call a plumber for hot water odor

    If the smell is strong, persistent, spreading to multiple fixtures, or coming with discoloration or heater performance issues, it is time to bring in a professional. The same goes for sulfur odors that keep returning after basic cleaning. A plumber can determine whether the problem is in the water heater, the piping, a specific fixture, or the home’s water quality.

    For homeowners in Hudson and surrounding communities, this kind of problem often comes down to practical troubleshooting rather than guesswork. At Mass Plumbing & Heating, that means looking at the full picture – your water heater, your plumbing, and how the odor shows up in daily use.

    A bad smell from hot water is easy to put off when everything still seems to be working. But odors usually start for a reason, and the earlier you identify that reason, the easier the fix tends to be. If your hot water smells off, trust that your home is telling you something worth checking.

  • Radiant Heat vs Baseboard Heating

    Radiant Heat vs Baseboard Heating

    If you are deciding between radiant heat vs baseboard heating, the real question is not which system is better on paper. It is which one fits your home, your comfort preferences, and your budget in a Massachusetts winter. A heating system can look great in a brochure and still be the wrong choice for your layout, flooring, boiler setup, or renovation plans.

    For many homeowners, this decision comes up during a boiler replacement, a remodel, or when an older heating system starts showing its age. Both radiant heat and baseboard heating can keep a home warm and comfortable. But they do it in very different ways, and those differences affect everything from energy use to furniture placement.

    Radiant heat vs baseboard heating: the basic difference

    Baseboard heating warms a room from the perimeter. In a hydronic system, hot water moves through baseboard units installed along the walls, and the heat rises into the room. This is a familiar setup in many New England homes because it is reliable, relatively straightforward to install, and works well with boiler systems.

    Radiant heat works more quietly and more evenly. Instead of heating the air near the walls first, it warms the floor surface or another broad area, which then radiates heat upward. In most homes, that means tubing installed beneath the floor and connected to a boiler. You feel the warmth across the room rather than just near the heating element.

    That difference changes the experience of the room. Baseboard heat tends to create warmer zones near the units and cooler spots farther away. Radiant heat usually feels more consistent from wall to wall.

    Comfort is where radiant often stands out

    If comfort is your top priority, radiant heat usually gets the edge. Warm floors on a cold morning are hard to beat, especially in bathrooms, kitchens, and finished basements. The heat feels gentle and steady, without the temperature swings some homeowners notice with other systems.

    Baseboard heating can still provide solid comfort, especially when the system is sized correctly and maintained well. Many homes in Hudson and the surrounding area rely on baseboard heat every winter without issue. But it does heat in a more noticeable cycle. Rooms can feel warm when the system is actively running and a little less even when it is not.

    Radiant heat also reduces drafts because it does not rely on blowing air around. That can make a room feel warmer even at a slightly lower thermostat setting. For some families, that translates to better comfort and lower operating costs. For others, the difference is noticeable but not dramatic enough to justify a major retrofit.

    Installation cost and complexity matter

    This is where the choice often becomes practical very quickly. Baseboard heating is usually the less expensive and less invasive option to install, especially in an existing home. If you already have a compatible boiler and piping layout, replacing old baseboards or extending heat to an addition can be fairly manageable.

    Radiant heat is more involved. In new construction or a major renovation, it can be an excellent fit because the floors are already open. In an existing home, adding radiant tubing under finished floors can require significant labor, floor height adjustments, or access from below. That does not make it a bad investment, but it does mean the project needs careful planning.

    If your home already has baseboard heat and the system works reasonably well, switching the entire house to radiant may not be the most cost-effective move. On the other hand, adding radiant heat to a single space, such as a bathroom, mudroom, or basement, can be a smart upgrade that improves comfort where you notice it most.

    Efficiency depends on the house and the system design

    Homeowners often assume radiant heat is always more efficient. Sometimes it is, but not automatically.

    Radiant systems can be very efficient because they deliver heat evenly and often operate at lower water temperatures than traditional baseboard systems. When paired with a high-efficiency boiler and proper controls, they can offer excellent performance. They also help reduce the urge to crank the thermostat up and down because the heat feels more balanced.

    Baseboard heating can also be efficient when it is properly designed and maintained. If the boiler is in good condition, the zones are set up well, and the home has decent insulation, baseboard heat can do the job effectively. In many homes, the biggest source of wasted energy is not the type of emitter at all. It is an older boiler, poor controls, air leaks, or lack of maintenance.

    That is why heating choices should be looked at as part of the whole system. Boiler condition, insulation levels, window quality, and room-by-room heat loss all matter. The best setup is rarely about one component alone.

    Radiant heat vs baseboard heating in older Massachusetts homes

    Older homes present a special case. Many houses in this area were built long before modern heating expectations, and that affects what is realistic.

    Baseboard heating often fits older homes better because it can work around the existing structure with less disruption. It is easier to adapt to rooms with uneven floors, finished walls, or limited access. If your goal is dependable heat without opening up large sections of the house, baseboard may be the simpler path.

    Radiant heat can still work beautifully in older homes, but usually in targeted applications or during major renovations. A kitchen remodel, bathroom upgrade, or basement finishing project is often the right time to consider it. Trying to retrofit radiant heat throughout a fully finished older home can become expensive quickly.

    There is also the flooring question. Tile and stone pair especially well with radiant heat because they transfer warmth effectively. Wood, vinyl, and other finishes can work too, but they need to be matched carefully with the system design.

    Maintenance and repair considerations

    Baseboard systems are generally easy to access. If a section is not heating properly, the issue may be traced to air in the line, a zone valve problem, sludge buildup, or the boiler itself. Because the components are exposed, troubleshooting is usually more straightforward.

    Radiant systems are reliable when installed correctly, but repairs can be more complicated depending on where the tubing is located. The good news is that the tubing itself is designed for long-term performance. The more common service points are manifolds, pumps, controls, and boiler-related components rather than the tubing under the floor.

    For a homeowner, the practical takeaway is simple. Baseboard heat is easier to modify and simpler to access. Radiant heat is cleaner visually and excellent for comfort, but it rewards good design and professional installation from the start.

    How each system affects the room itself

    This point gets overlooked until furniture starts moving in.

    Baseboard heating takes up wall space. That can limit where you place couches, beds, and curtains. It also means the perimeter of the room needs to stay relatively clear for the heat to move properly. In some rooms, that is no problem. In others, especially smaller bedrooms or finished lower levels, it can be frustrating.

    Radiant heat is hidden. There are no visible units along the walls, which gives you more flexibility in the room design. If you are remodeling and want a cleaner look, that can be a major advantage.

    There is a trade-off, though. Radiant heat responds more slowly. If you like quick temperature changes, baseboard heat may feel more responsive. Radiant systems are better when you want steady, consistent warmth over time rather than fast adjustments.

    Which one is right for your home?

    If you want a lower upfront cost, easier installation, and a heating system that works well with many existing boiler setups, baseboard heating is often the practical choice. It has been common in this region for a reason. It is dependable, serviceable, and effective.

    If your priority is premium comfort, even heat, and a cleaner-looking room without visible heating units, radiant heat is often worth serious consideration. It shines in bathrooms, kitchens, additions, and homes undergoing larger renovations.

    Some of the best results come from using both. A home might keep baseboard heat in the main living areas while adding radiant heat in a remodeled bathroom or basement. That kind of blended approach can improve comfort without turning the project into a full-house overhaul.

    A trusted local expert can help you look beyond the basic pros and cons and evaluate the system in the context of your actual home. Mass Plumbing & Heating works with homeowners across the area on boilers, radiant systems, baseboard heat, and heating upgrades, so the right answer can be based on how your home is built, not just what sounds best.

    The right heating system is the one that keeps your family comfortable, fits your home without unnecessary complications, and makes sense for the way you plan to live there for years to come.

  • Why Is Shower Water Cold? Common Causes

    Why Is Shower Water Cold? Common Causes

    A shower that turns cold halfway through the morning routine usually feels like it came out of nowhere. If you’re asking why is shower water cold, the answer is usually tied to one of a few home system issues – your water heater, your plumbing fixtures, or how hot water is being used elsewhere in the house.

    The good news is that some causes are simple and temporary. Others point to a repair that should not be ignored, especially if the problem is getting worse, affecting multiple fixtures, or showing up alongside leaks, noises, or inconsistent water temperature throughout the home.

    Why Is Shower Water Cold Even When the Sink Is Hot?

    This is one of the most common clues homeowners notice, and it matters. If the sink gets hot water but the shower stays lukewarm or cold, the issue may not be your entire hot water supply. It may be isolated to the shower valve, the anti-scald setting, or a cartridge inside the fixture that is no longer mixing hot and cold water correctly.

    Modern shower valves are designed to protect against sudden temperature swings. That is a good thing, especially for families with children, but these parts can wear out or get out of adjustment over time. When that happens, the valve may limit hot water too much or fail to pull enough hot water through at all.

    If only one shower is affected, the water heater is less likely to be the main problem. If every shower and faucet in the house is cold or running out quickly, it is more likely to be a system-wide issue.

    The most common reasons shower water turns cold

    In many homes, the simplest explanation is that the hot water supply is running out. Traditional tank water heaters store a fixed amount of hot water. Once that supply is used up, the heater needs time to recover. A long shower, back-to-back showers, laundry, or a running dishwasher can use more hot water than the tank can keep up with.

    This becomes especially noticeable in larger households or in homes with an older water heater. Sediment buildup inside the tank can also reduce the effective amount of hot water available. So even if the heater is technically working, it may not be performing like it used to.

    A thermostat issue is another possibility. If the water heater is set too low, or if one of the thermostats or heating elements is malfunctioning, the water may never get fully hot. Electric water heaters often have upper and lower elements, and if one fails, you can end up with limited hot water that fades fast.

    Gas water heaters bring a different set of possibilities. A pilot light problem, burner issue, gas supply interruption, or venting problem can all affect heating performance. Sometimes the unit still produces some warm water, which makes the issue harder to spot right away.

    Then there is the shower itself. A worn pressure-balancing valve or mixing cartridge can cause cold water to overpower the hot side. In some cases, the shower starts warm and then shifts colder as the valve struggles to maintain temperature.

    Why is shower water cold in only one bathroom?

    When the problem is limited to one bathroom, it usually points to a local plumbing or fixture issue rather than the main water heater. The shower cartridge may be clogged with mineral buildup or simply worn out. The anti-scald limit could also be set too conservatively, which restricts how much hot water reaches the shower.

    Homes in Massachusetts can see mineral scaling over time depending on water conditions and equipment setup. That buildup can interfere with moving parts inside the valve body and affect how the shower blends hot and cold water.

    There is also the possibility of a hidden cross-connection. That means cold water is mixing into the hot line somewhere it should not. A faulty single-handle faucet, mixing valve, or other fixture can sometimes create this problem. It is less common, but when it happens, it can be frustrating to diagnose without proper testing.

    Signs your water heater may be the real problem

    If the shower goes cold and so do the sinks, tubs, and other fixtures, the water heater deserves a closer look. Age is a major factor. A standard tank water heater often lasts around 8 to 12 years, depending on maintenance, water quality, and usage. Tankless systems can last longer, but they still require regular service.

    Listen for rumbling or popping noises from the tank. Check for rust-colored water, moisture around the unit, or a noticeable drop in how long hot water lasts. These signs often show up before a complete failure.

    It also matters whether the water is fully cold or just not hot enough. Fully cold water can suggest the heater is not firing or heating at all. Lukewarm water often points to sediment, a thermostat problem, a failed element, or undersized equipment struggling to meet demand.

    If your system has been meeting your household’s needs for years and suddenly cannot keep up, that is a warning sign. If it has never kept up well, the issue may be sizing rather than repair.

    What you can safely check before calling a plumber

    Start with the obvious. See whether the issue affects only the shower or the entire house. Run hot water at a nearby sink and another bathroom if possible. This quick test helps narrow down whether you are dealing with a fixture problem or a larger hot water issue.

    Next, consider timing. Did the shower turn cold after someone ran the dishwasher or did multiple people shower back to back? If so, you may simply be exhausting the available hot water. That does not always mean something is broken, but it may mean your current setup is not matching your household’s needs.

    If you have a tank water heater, check the thermostat setting if it is safely accessible. Do not disassemble anything, and do not attempt gas or electrical repairs on your own. For many homeowners, visual checks are enough. Look for leaks, error codes, an extinguished pilot light if you know how to identify one, or signs that the unit has lost power.

    At the shower, notice whether the handle feels stiff, loose, or inconsistent. That can point toward a cartridge or valve issue. If the temperature changes sharply when another fixture runs, pressure balancing may be part of the problem.

    When cold shower water means you should call for service

    If you have no hot water anywhere in the home, service is the right next step. The same goes for a leaking water heater, repeated pilot light issues, breaker trips, discolored water, or sudden changes in performance from an older unit.

    You should also call if only one shower is affected and basic checks suggest the rest of the house has hot water. Shower valve repairs are often straightforward for a trained plumber, but the exact cause can be hard to pinpoint without opening the fixture and testing the components.

    For households that regularly run out of hot water, the answer may not be a repair at all. It could be time to discuss a replacement, a larger tank, or a tankless or hybrid system better suited to your usage. A dependable local contractor like Mass Plumbing & Heating can help determine whether the issue is wear, repairable component failure, or a system that no longer fits the home.

    Preventing future cold shower problems

    Regular maintenance makes a difference. Water heaters work hard every day, and they perform better when sediment is managed, components are inspected, and minor issues are handled before they become major failures.

    Fixture maintenance matters too. Shower valves and cartridges do not last forever, and replacing worn parts can restore proper temperature control before the problem becomes more disruptive.

    It is also worth thinking about how your home uses hot water. A family of five has very different demand than a one- or two-person household. Home additions, finished basements, and newer high-flow fixtures can all change the load on your hot water system.

    Cold shower water is frustrating, but the cause is usually identifiable with the right troubleshooting. Sometimes it is just a matter of demand outrunning supply. Sometimes it is a worn shower part. And sometimes it is your water heater telling you it needs attention before it fails completely. The sooner you pinpoint the reason, the sooner your home gets back to normal.

  • Water Softener Installation Cost Explained

    Water Softener Installation Cost Explained

    Hard water usually shows up in small, annoying ways first – white spots on dishes, soap that will not lather well, dry skin, and scale buildup around faucets. Then it starts costing you money through shorter appliance life, clogged fixtures, and reduced water heater efficiency. If you are researching water softener installation cost, you are probably already weighing whether the upfront investment is worth it for your home.

    For many homeowners, the answer depends on more than the price of the unit itself. The full cost can change based on the type of softener, your home’s plumbing layout, your water usage, and whether any code updates or additional treatment equipment are needed. A clear estimate should account for the whole job, not just the box being installed.

    What affects water softener installation cost?

    The biggest factor is the type and size of the system. A smaller home with moderate water use may only need a basic ion-exchange softener sized for one or two bathrooms. A larger household with multiple bathrooms, a high-capacity water heater, irrigation considerations, or heavy daily demand may need a larger system with more resin capacity and stronger flow performance.

    Brand and features also matter. Some systems are straightforward and reliable, while others include demand-initiated regeneration, digital controls, leak alerts, Wi-Fi monitoring, or paired filtration stages. Those upgrades can add convenience and efficiency, but they also raise the installed price.

    The plumbing setup in the home plays a major role as well. If the main water line is easy to access and there is a practical installation area near a drain and power source, labor is usually more straightforward. If the installer needs to reroute piping, add a drain connection, create a bypass assembly, or work in a tight unfinished basement or utility area, labor time increases.

    In Massachusetts homes, age can be a factor. Older houses sometimes have a plumbing layout that needs adjustment before a softener can be installed properly. Existing shutoffs may need replacement, pipe materials may require extra care, and space planning can be more involved than in a newer home.

    Typical water softener installation cost ranges

    For a professionally installed residential system, many homeowners can expect a water softener installation cost somewhere between about $1,500 and $4,000. That is a broad range because every house is different, but it is a useful starting point for budgeting.

    At the lower end, you are typically looking at a simpler installation with a standard softener in a home that already has a good location for the system. At the higher end, the cost may include a larger-capacity unit, plumbing modifications, upgraded controls, or a combined treatment approach that addresses both hardness and other water quality concerns.

    Some projects go above that range. That often happens when a home needs both softening and filtration, or when the installer is correcting older plumbing issues at the same time. If your water contains iron, manganese, sediment, or problem odors, a softener alone may not be the complete solution.

    That is why a quick price found online can be misleading. A unit price is not the same thing as a finished installation that performs well, drains properly, and fits the home safely.

    System type changes the price

    Most homeowners are considering a salt-based ion-exchange softener, which is still the standard choice for true hardness removal. These systems exchange calcium and magnesium ions for sodium or potassium, which helps reduce scale buildup throughout the home. They are effective, dependable, and widely used, but they do require ongoing salt refills and periodic maintenance.

    Salt-free systems are often marketed as a lower-maintenance option. In some cases, they can help reduce scale formation, but they do not remove hardness in the same way a traditional softener does. They may be a reasonable fit for certain homes, but they are not always the right answer if hard water is causing significant buildup or appliance wear.

    Dual-tank or high-efficiency models can cost more upfront, but they may make sense for larger households or homes that cannot afford interruptions in soft water supply. If the home has high demand, choosing too small a system can create performance problems and reduce the value of the installation.

    Installation details that add to the total cost

    The labor portion of water softener installation cost can vary more than homeowners expect. A few details often make the difference.

    If there is no nearby drain for the regeneration discharge, one may need to be added or extended. If there is no electrical outlet in the installation area, that can affect setup as well. If the incoming main line is in a cramped corner or tied into older piping, the work can take longer and require more planning.

    Bypass valves, shutoff valves, expansion considerations, and code-compliant drain connections are all part of doing the job correctly. These are not flashy line items, but they matter. A proper installation should make future service easier and protect the rest of the plumbing system.

    There is also the question of pre-treatment and post-treatment. If your home has sediment, acidity, or iron issues, the recommended system may include additional equipment before or after the softener. That raises the total project cost, but it can also prevent premature wear and improve performance.

    Is DIY installation worth it?

    Some homeowners look at a boxed system and wonder if installing it themselves will save enough to justify the effort. It can reduce labor costs in a simple situation, but there are trade-offs.

    A water softener needs to be sized correctly, placed in the right location, tied into the main water supply in the proper direction, connected to a drain safely, and programmed for the household’s usage and hardness level. If any part of that is off, the system may not work as intended. You could end up with pressure loss, salt overuse, drain problems, leaks, or untreated water reaching parts of the home.

    For many homeowners, professional installation is less about convenience and more about getting a system that performs properly from day one. It also gives you a chance to confirm whether a softener is the right solution in the first place.

    How to judge value, not just price

    The lowest quote is not always the best value. A cheaper install may leave out water testing, use an undersized unit, skip plumbing improvements, or fail to address related issues that affect performance. Over time, that can lead to more service calls and disappointing results.

    A good estimate should explain what system is being installed, why it was selected, what plumbing work is included, and whether any extras may be needed based on the home’s layout or water quality. Homeowners should also ask about maintenance, expected salt use, warranty coverage, and what kind of support is available if the system needs adjustment after installation.

    That matters even more when you are planning for the long term. A properly selected and installed softener can help protect water heaters, dishwashers, washing machines, shower valves, and fixtures. It may also improve soap performance and reduce the amount of cleaning needed around sinks, tubs, and glass.

    When a softener makes the most financial sense

    If your water is only mildly hard and you are not seeing many problems, the payback may feel less obvious. But in homes with noticeable scale, appliance issues, or frequent fixture buildup, softening often makes practical sense. It can reduce wear on equipment and help your plumbing system run more efficiently.

    Water heater performance is one area homeowners often overlook. Hard water scale inside a water heater can reduce efficiency and increase strain on the system over time. If you are already protecting an investment in a newer water heater, addressing hard water may help that equipment last longer.

    Families also notice the day-to-day difference. Softer water can be easier on skin, hair, towels, and clothing. Those comfort benefits may not show up on a quote sheet, but they are part of the decision.

    Getting an accurate estimate for your home

    The most useful estimate comes from looking at the actual house, not from guessing over the phone. A contractor should consider the home’s water usage, hardness level, plumbing access, drain options, and whether any related treatment is needed. That is how you get a realistic picture of water softener installation cost instead of a number that changes later.

    For homeowners in Hudson and nearby communities, working with a local plumbing company that understands area homes and water conditions can make that process easier. A team like Mass Plumbing & Heating can help you sort out whether a standard softener is enough or whether your home would benefit from a broader water treatment setup.

    If hard water has been quietly wearing down your fixtures and equipment, this is one upgrade that often pays off in ways you notice every day. The right question is not just what it costs to install, but what it costs to keep living with the problem.

  • Water Filtration Systems Review for Homes

    Water Filtration Systems Review for Homes

    A glass of water can look perfectly clear and still leave you with hard-water spots, chlorine taste, stained fixtures, or concerns about what is actually coming through the tap. That is where a smart water filtration systems review helps. The right system can improve taste, protect plumbing, and make everyday water use feel a lot better, but the best choice depends on what is in your water and what you want to fix.

    For homeowners in Massachusetts, that last part matters. Water quality is not one-size-fits-all. Some homes deal with hard water, others notice sediment, sulfur odors, iron staining, or chlorine taste from municipal supply. Private well owners often face a different set of issues than public water customers. A filtration system that works well in one home may be a poor fit in the next.

    What a water filtration systems review should actually cover

    A useful review is not just a list of products. It should look at the job each system is designed to do, how much maintenance it needs, how it affects water pressure, and whether it treats one faucet or the entire house.

    That matters because many homeowners start with a broad goal like cleaner water, then realize they have a more specific problem. If your dishes come out cloudy, that points in a different direction than rotten-egg odor at the kitchen sink. If your concern is drinking water only, a point-of-use filter may make sense. If you want to protect showers, laundry, appliances, and pipes, you are usually looking at whole-house treatment.

    The main types of home water filtration systems

    Carbon filters

    Carbon filtration is one of the most common and practical options for city water. These systems are especially good at reducing chlorine taste and odor, along with some organic compounds that affect smell and flavor. If your water is safe but unpleasant to drink, carbon often gives the most noticeable improvement for the least complexity.

    The trade-off is that carbon filters are not a cure-all. They do not soften hard water, and they are not the best answer for heavy sediment, iron, or bacterial concerns. They also need regular cartridge replacement. When maintenance gets skipped, performance drops.

    Sediment filters

    Sediment filters are simple, but they play an important role. They catch dirt, rust, and suspended particles before that material moves deeper into your plumbing system or into more specialized filters. In homes with well water or older piping, this can be a very smart first line of defense.

    On their own, sediment filters are limited. They improve clarity, but they do not handle taste, odor, hardness, or dissolved contaminants. In many homes, they work best as one stage in a larger treatment setup.

    Reverse osmosis systems

    Reverse osmosis systems are often installed under the kitchen sink to produce high-quality drinking and cooking water. They are effective at reducing a wide range of dissolved solids and can make a major difference if you are concerned about the purity of what you drink.

    That said, reverse osmosis is not always the most practical whole-home choice. It is slower than standard filtration, wastes some water during the treatment process, and usually requires more maintenance than a basic carbon filter. For many homeowners, it is excellent at one faucet and unnecessary everywhere else.

    Water softeners

    Strictly speaking, a softener is not the same as a filter, but it belongs in any honest water filtration systems review because homeowners often need one more than they need filtration. If your real problem is hard water, a softener addresses the mineral content that causes scale buildup, soap scum, dry skin, and wear on water-using appliances.

    A softener can protect water heaters, dishwashers, washing machines, and plumbing fixtures. It can also improve how soap works throughout the home. The downside is ongoing salt use, periodic maintenance, and the fact that softening does not target every water-quality issue. Many homes benefit from a softener paired with another treatment method.

    Specialty filters for iron, sulfur, and other well-water issues

    Well water can come with very specific problems that basic filters do not solve well. Iron can stain sinks and laundry. Sulfur can create a strong rotten-egg smell. Other homes deal with manganese or acidity. In these cases, specialty treatment is usually the right path.

    This is where professional testing matters most. Guessing can get expensive fast. A homeowner may install a general-purpose filter and see little improvement because the actual issue requires a different media, an aeration step, or a properly sized treatment unit.

    Whole-house vs. point-of-use systems

    One of the biggest choices is whether to treat water at one location or at the main water line.

    Point-of-use systems treat water where you need it, usually at a kitchen sink or refrigerator line. They cost less upfront and make sense if your main goal is better drinking water. Reverse osmosis and smaller carbon systems often fall into this category.

    Whole-house systems treat water as it enters the home. That means every faucet, shower, appliance, and fixture benefits. If you are dealing with hard water, sediment, staining, or odor throughout the house, this is usually the better long-term solution. The upfront investment is higher, but so is the overall impact.

    What homeowners often get wrong

    The most common mistake is buying based on marketing rather than water conditions. A system can have impressive claims and still be the wrong match for your home. Another mistake is focusing only on purchase price. A cheaper system that needs frequent filter changes or does not solve the problem is not actually cheaper.

    Sizing is another issue. If a whole-house system is too small, you may notice pressure drop or poor performance during busy times of day. If it is oversized without a reason, you may pay more than necessary. Installation quality also matters more than many people expect. Even a strong system can disappoint if it is installed in the wrong configuration or without enough access for service.

    Cost, maintenance, and real-world value

    Homeowners usually want a clear answer on cost, but the honest answer is that pricing varies with the type of treatment, the size of the home, the condition of the plumbing, and whether the system serves one fixture or the whole house.

    Smaller under-sink systems are usually the most budget-friendly. Whole-house carbon filters, softeners, and specialty well-water systems cost more upfront, especially when professional installation is included. But value is not just about the equipment. It is also about protecting your pipes, water heater, fixtures, and appliances from wear caused by untreated water.

    Maintenance is part of ownership, and it should never be treated like a footnote. Filters need changing. Softeners need salt. Some systems need periodic sanitizing, testing, or media replacement. A good setup is one you can realistically keep up with.

    How to choose the right system for your home

    The best place to start is with the problem, not the product. Are you trying to improve taste at the tap, stop white scale on fixtures, reduce sediment, or solve a well-water odor issue? Those are different jobs.

    Next, look at your water source. Municipal water often points toward chlorine and taste concerns, while well water more often raises issues like sediment, iron, sulfur, or hardness. Then think about coverage. If the issue affects the whole house, a single-faucet filter will not be enough.

    Professional water testing or a site-specific evaluation often saves money in the long run because it narrows the solution to what your home actually needs. For homeowners who want practical guidance without the guesswork, working with a trusted local expert like Mass Plumbing & Heating can make the process much more straightforward.

    Water filtration systems review: which option is best?

    If your water tastes and smells bad but otherwise causes few issues, a carbon filter is often the most practical answer. If your drinking water is the only concern, under-sink reverse osmosis may be worth it. If hard water is damaging fixtures and appliances, a softener is usually the better investment. If you have well water with staining or odor, a specialty treatment system is often the right move.

    That is why there is no single winner in any water filtration systems review. The best system is the one that solves your actual water problem, fits your home, and stays maintainable over time.

    A good water treatment decision should make daily life easier, not more complicated. When the system matches the water, you notice it in small ways every day – better-tasting drinking water, cleaner fixtures, fewer plumbing headaches, and a home that simply runs better.

  • How to Bleed Baseboard Heat the Right Way

    How to Bleed Baseboard Heat the Right Way

    When one room stays chilly even though the thermostat is up, trapped air in the heating loop is often the reason. If you’re trying to figure out how to bleed baseboard heat, the good news is that the fix can be straightforward in some homes. The key is knowing what kind of system you have, where the air is actually trapped, and when a simple bleed is not enough.

    Baseboard heat works by sending hot water from the boiler through piping and fin-tube baseboard units around the house. When air gets into that closed loop, water flow can slow down or stop in part of the system. That is when homeowners notice baseboards that are warm on one end and cold on the other, rooms that never seem to catch up, or gurgling and rushing-water sounds inside the pipes.

    In Massachusetts, this tends to show up right when you need dependable heat the most. A heating system that is only half-working can feel like a small issue at first, but air in the lines can also point to pressure problems, leaks, or failing components. That is why it helps to treat bleeding baseboard heat as both a quick troubleshooting step and a chance to spot larger boiler issues early.

    How to bleed baseboard heat safely

    Before you do anything, make sure you are dealing with a hot-water baseboard system, not electric baseboard heat. Electric baseboard units do not have water in them, so there is nothing to bleed. If your home has a boiler, pipes, and fin-tube baseboards, you likely have hydronic baseboard heat.

    Next, lower the thermostat so the system is not actively calling for heat while you get set up. You do not want the circulator running hard while you are trying to release air. Give the system a few minutes to settle, and be careful around any piping or boiler components that may still be hot.

    Some baseboard systems have manual bleeder valves on the baseboard itself or at high points in the piping. Others do not. In many homes, bleeding is done at the boiler through purge valves rather than at each baseboard unit. That difference matters. If you start opening valves without understanding the layout, you can make a mess, drop system pressure, or fail to remove the air where it is actually trapped.

    If you do have manual bleeder valves, place a cup or rag under the valve and use the proper key or screwdriver, depending on the style. Open it slowly, just enough to let air hiss out. Once you get a steady stream of water with no sputtering, close the valve snugly. Do not overtighten it.

    Move carefully from one affected zone or unit to the next if your setup allows for that. In a simple one-zone system, that may be all you need. In a multi-zone system, especially one with zone valves and purge stations near the boiler, the proper process is usually more controlled than just opening baseboard vents one by one.

    What to watch while bleeding

    The biggest thing to monitor is boiler pressure. Most residential hot-water boiler systems need enough pressure to push water to the highest point in the house. If pressure drops too low while you are bleeding air, you can end up pulling in more air or leaving upper floors without circulation.

    A typical cold-fill pressure is often around 12 to 15 psi in a two-story home, but it depends on the height and layout of the system. If the gauge is already reading low before you start, bleeding the system may not solve the problem by itself. You could be dealing with a faulty pressure-reducing valve, an expansion tank issue, or a small leak somewhere in the piping.

    It also matters what comes out of the valve. A quick burst of air followed by steady water is normal. Dirty water, weak sputtering that never clears, or no water at all suggests there may be a circulation or fill problem. If you keep opening bleeders and only get air, stop and reassess. That usually means the system is not maintaining proper water pressure.

    When baseboard heat needs purging, not just bleeding

    This is where many homeowners get stuck. They search for how to bleed baseboard heat, but their system really needs a zone purge at the boiler. That is common when a zone is completely cold, after recent boiler work, after a leak repair, or when the system has taken on a lot of air.

    Purging usually involves isolating one zone at a time, using shutoff valves and a drain valve near the boiler, and forcing fresh water through the loop until all the air is pushed out. It is more effective than opening a small bleeder at the end of a baseboard run because it moves a stronger volume of water through the full circuit.

    The trade-off is that purging is more technical. You need to understand which valves to close, which to open, and how to avoid overfilling or stressing older components. On some systems, the setup is clear and accessible. On others, especially in older homes around Hudson and surrounding communities, the boiler piping has been modified over the years and is not always homeowner-friendly.

    Signs the problem is bigger than trapped air

    Air does not always show up on its own. If you find yourself bleeding the same zone repeatedly, there is usually another cause behind it. A closed heating system should not need constant air removal.

    One common issue is a small leak. It may be obvious, like water under the boiler, or subtle, like a damp fitting that evaporates before you notice it. Another possibility is an expansion tank that has lost its charge. When that happens, pressure swings can become more severe, which can pull air into the system or trigger relief valve discharge.

    A failing automatic air vent near the boiler can also play a role. So can circulator problems, especially if the pump is running but not moving water effectively through a zone. In some cases, the baseboard itself is not the problem at all. A stuck zone valve, clogged line, or boiler control issue may be what is leaving one part of the house cold.

    If you hear banging, frequent gurgling, or notice pressure changes every time the boiler runs, those are worth taking seriously. A system that is noisy and uneven today can turn into a no-heat call during the next cold snap.

    A few practical tips before you start

    Have towels ready and wear gloves if you are working near hot piping. Use a small container so you can catch water without soaking flooring or trim. If your bleeder valve looks corroded or feels fragile, do not force it. Replacing a snapped bleeder or leaking vent is a bigger repair than most homeowners want to create on purpose.

    It also helps to think about timing. If the system has been cold for hours, the pressure reading may be different than when it is fully hot. If you have recently added water to the boiler, give it a little time to stabilize. Quick adjustments often lead to confusion because you are reading the system before it settles.

    And if your home has an older boiler, do not assume every valve should be touched. Some older shutoffs and drains do not reseal cleanly once disturbed. That does not mean the system cannot be serviced. It just means careful handling matters.

    When to call for service

    If you cannot find bleeder valves, if pressure drops too low, if one zone stays cold after bleeding, or if the system keeps pulling in air, it is time for a professional diagnosis. The same goes for any active leak, relief valve discharge, or boiler that is short cycling or making unusual noise.

    For many homeowners, the safest approach is to handle the obvious simple step and call when the signs point beyond that. There is no downside to being cautious with a boiler system. Good heat depends on proper pressure, clean circulation, functioning controls, and safe operation as a whole.

    At Mass Plumbing & Heating, we see this often in homes where one room never heats evenly or where a recent repair introduced air into the system. Sometimes the answer is a quick purge and pressure check. Sometimes it leads to catching a failing component before it causes a complete no-heat situation.

    If you are learning how to bleed baseboard heat, think of it as a first response, not a cure-all. When the system responds well, great. When it does not, that is useful information too. A quiet, evenly heated home is usually the result of a boiler system that is balanced, pressurized correctly, and serviced before small warning signs turn into winter emergencies.